

VPN as a Service (VPNaaS)
OpenStack supports on demand Site-to-Site VPNs as a service. This allows the user to connect two private networks to each other. To achieve this, OpenStack will configure a fully functional IPsec VPN within a project, without the need for additional networking VMs.
Setting up a Site-to-Site IPSec VPN
Create left and right networks and subnets
Before we can create a VPN, we need two separate networks to connect to each other. For this guide, we will create these networks in two different OpenStack projects which will be referred to as “left” and “right”. The following steps have to be repeated for both networks (“left” and “right”), assuming you want to connect two different OpenStack clusters. For the sake of simplicity, this guide will only demonstrate how to create the left network. For OpenStack, the steps to create the right network are exactly the same with exception to naming and subnet prefix In this example, we will be using the subnet prefix 2001:db8:1:33bc::/64 for the left network and 2001:db8:1:33bd::/64 for the right.
If you already have two networks you would like to connect via Site-to-Site VPN, you can skip to creating IKE and IPSec policies.
Using Horizon (GUI)
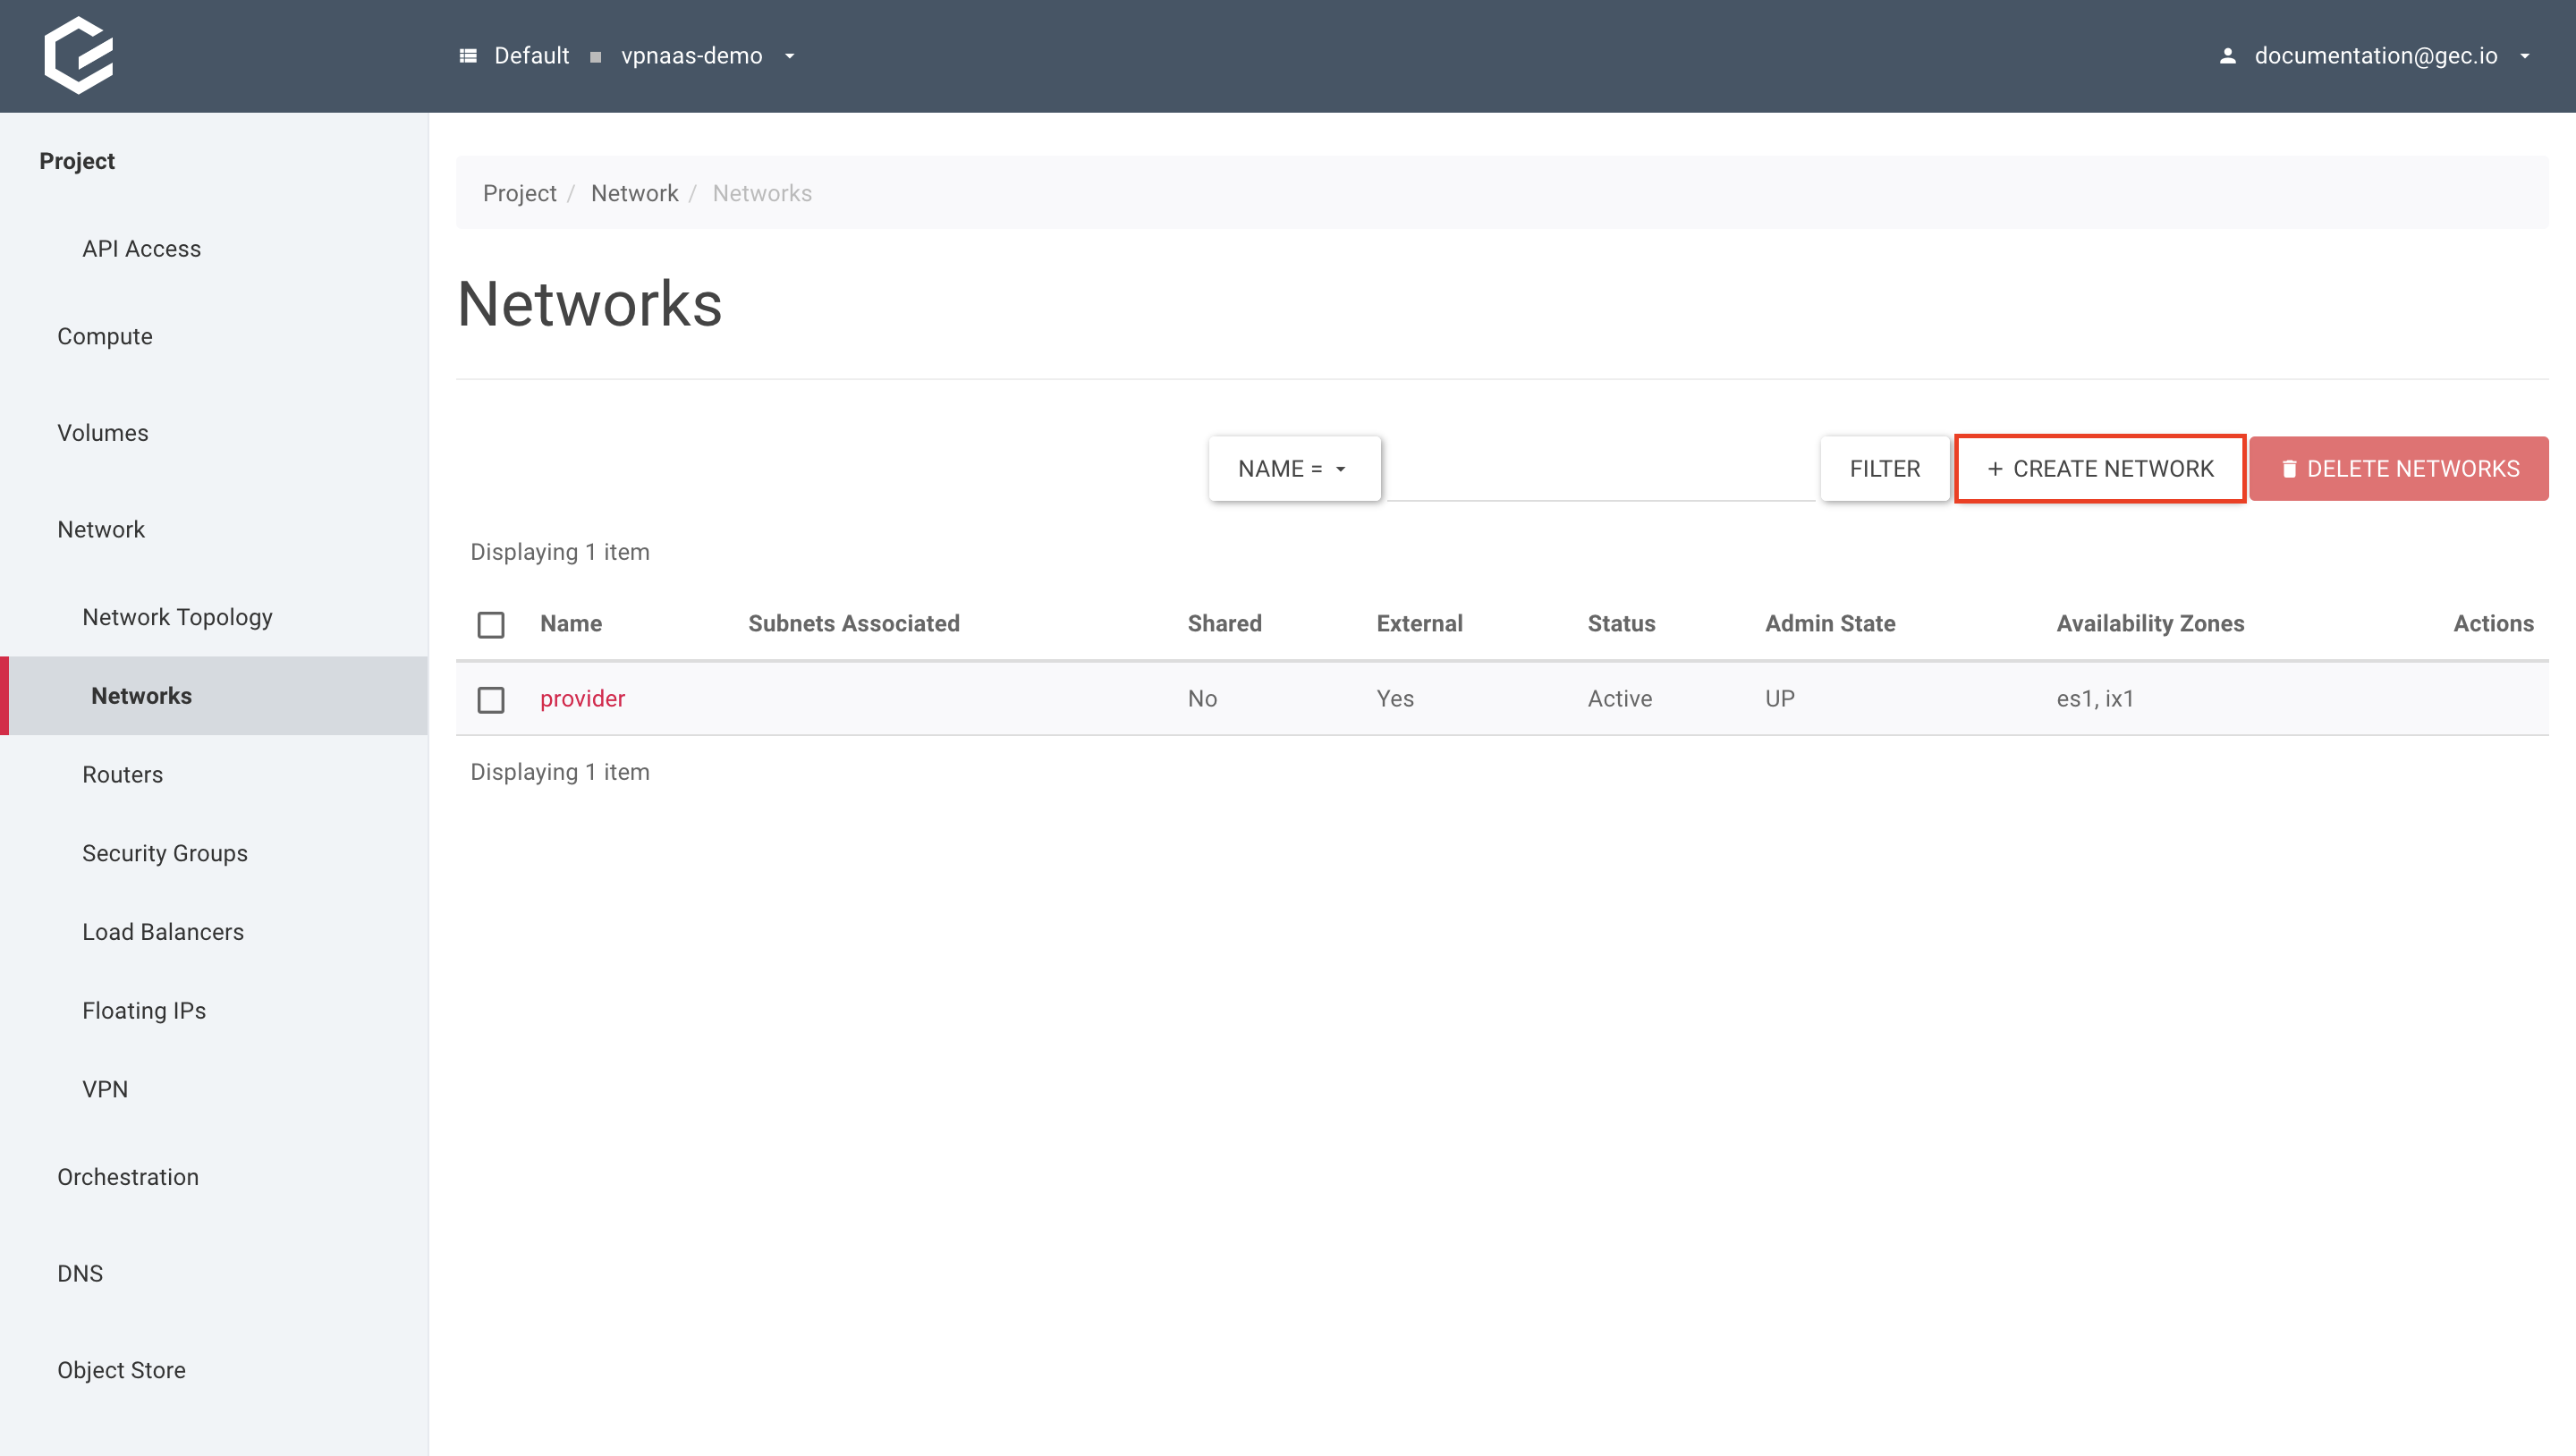
- Create the left network with a new subnet.
Within your project, navigate to Network → Networks and click Create Network.
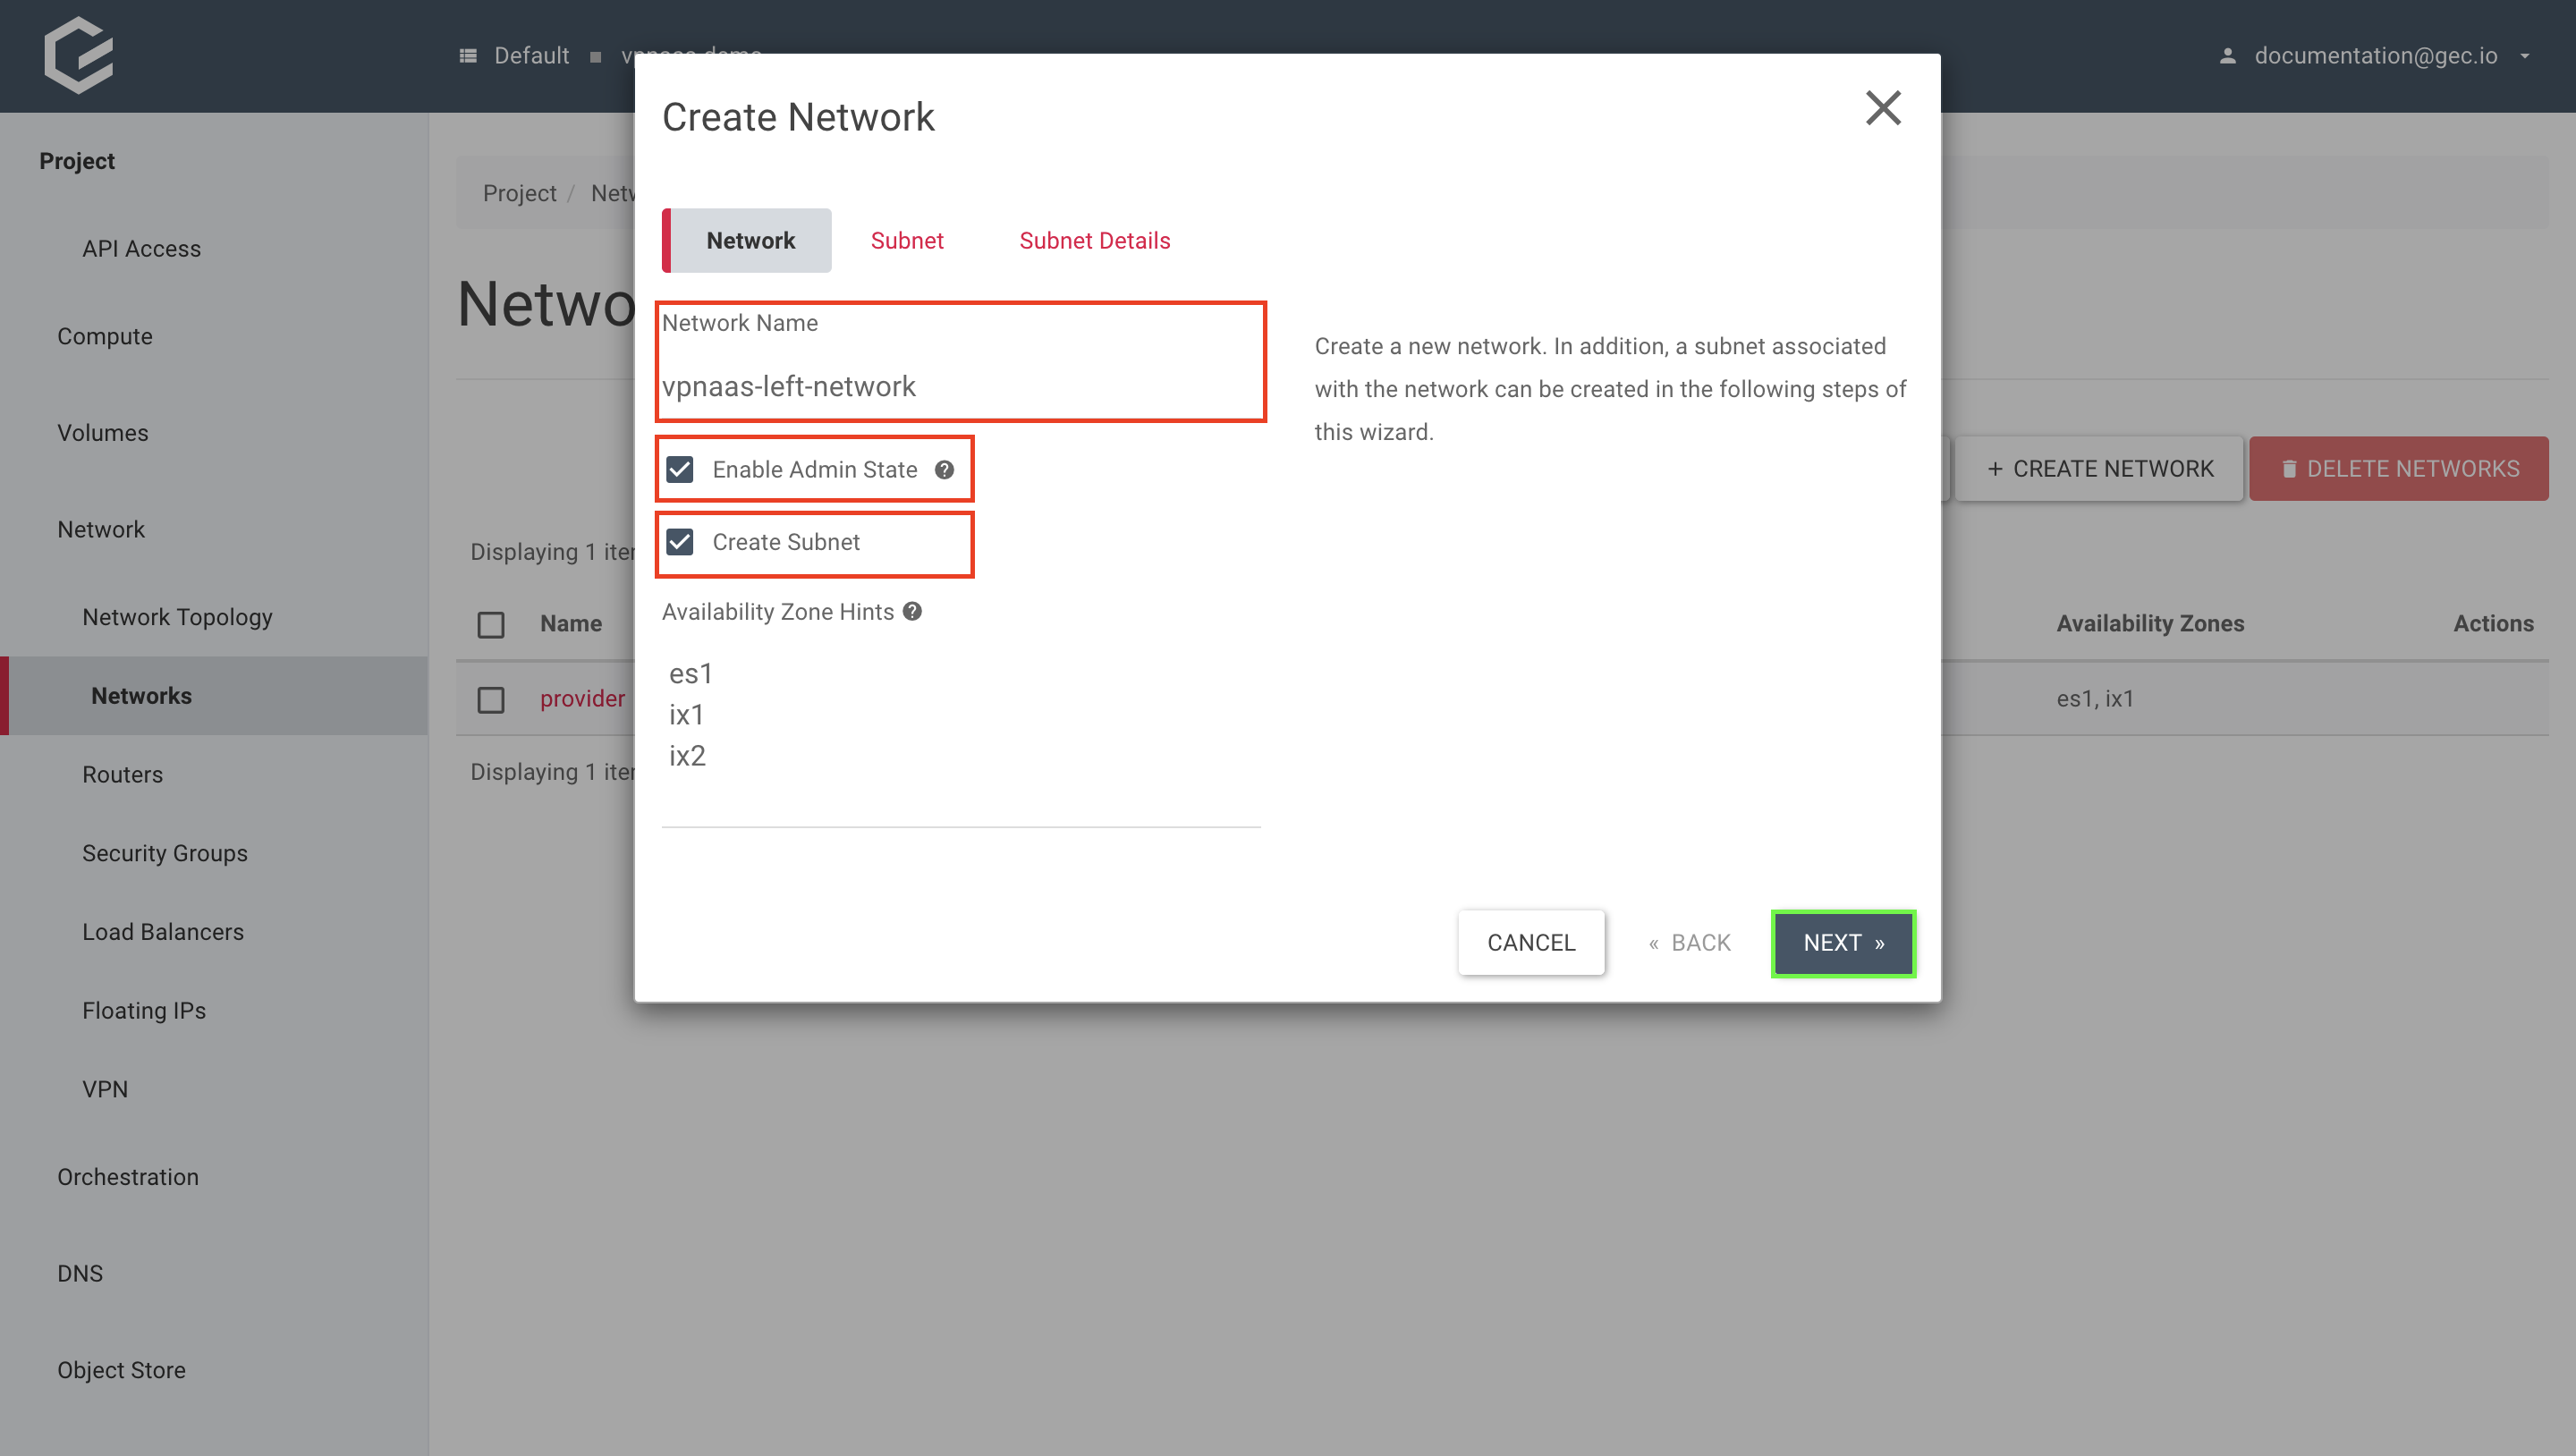
Give your new network a name, select Enable Admin State to enable the network and Create Subnet to create the network and subnet all in one step. Click Next.
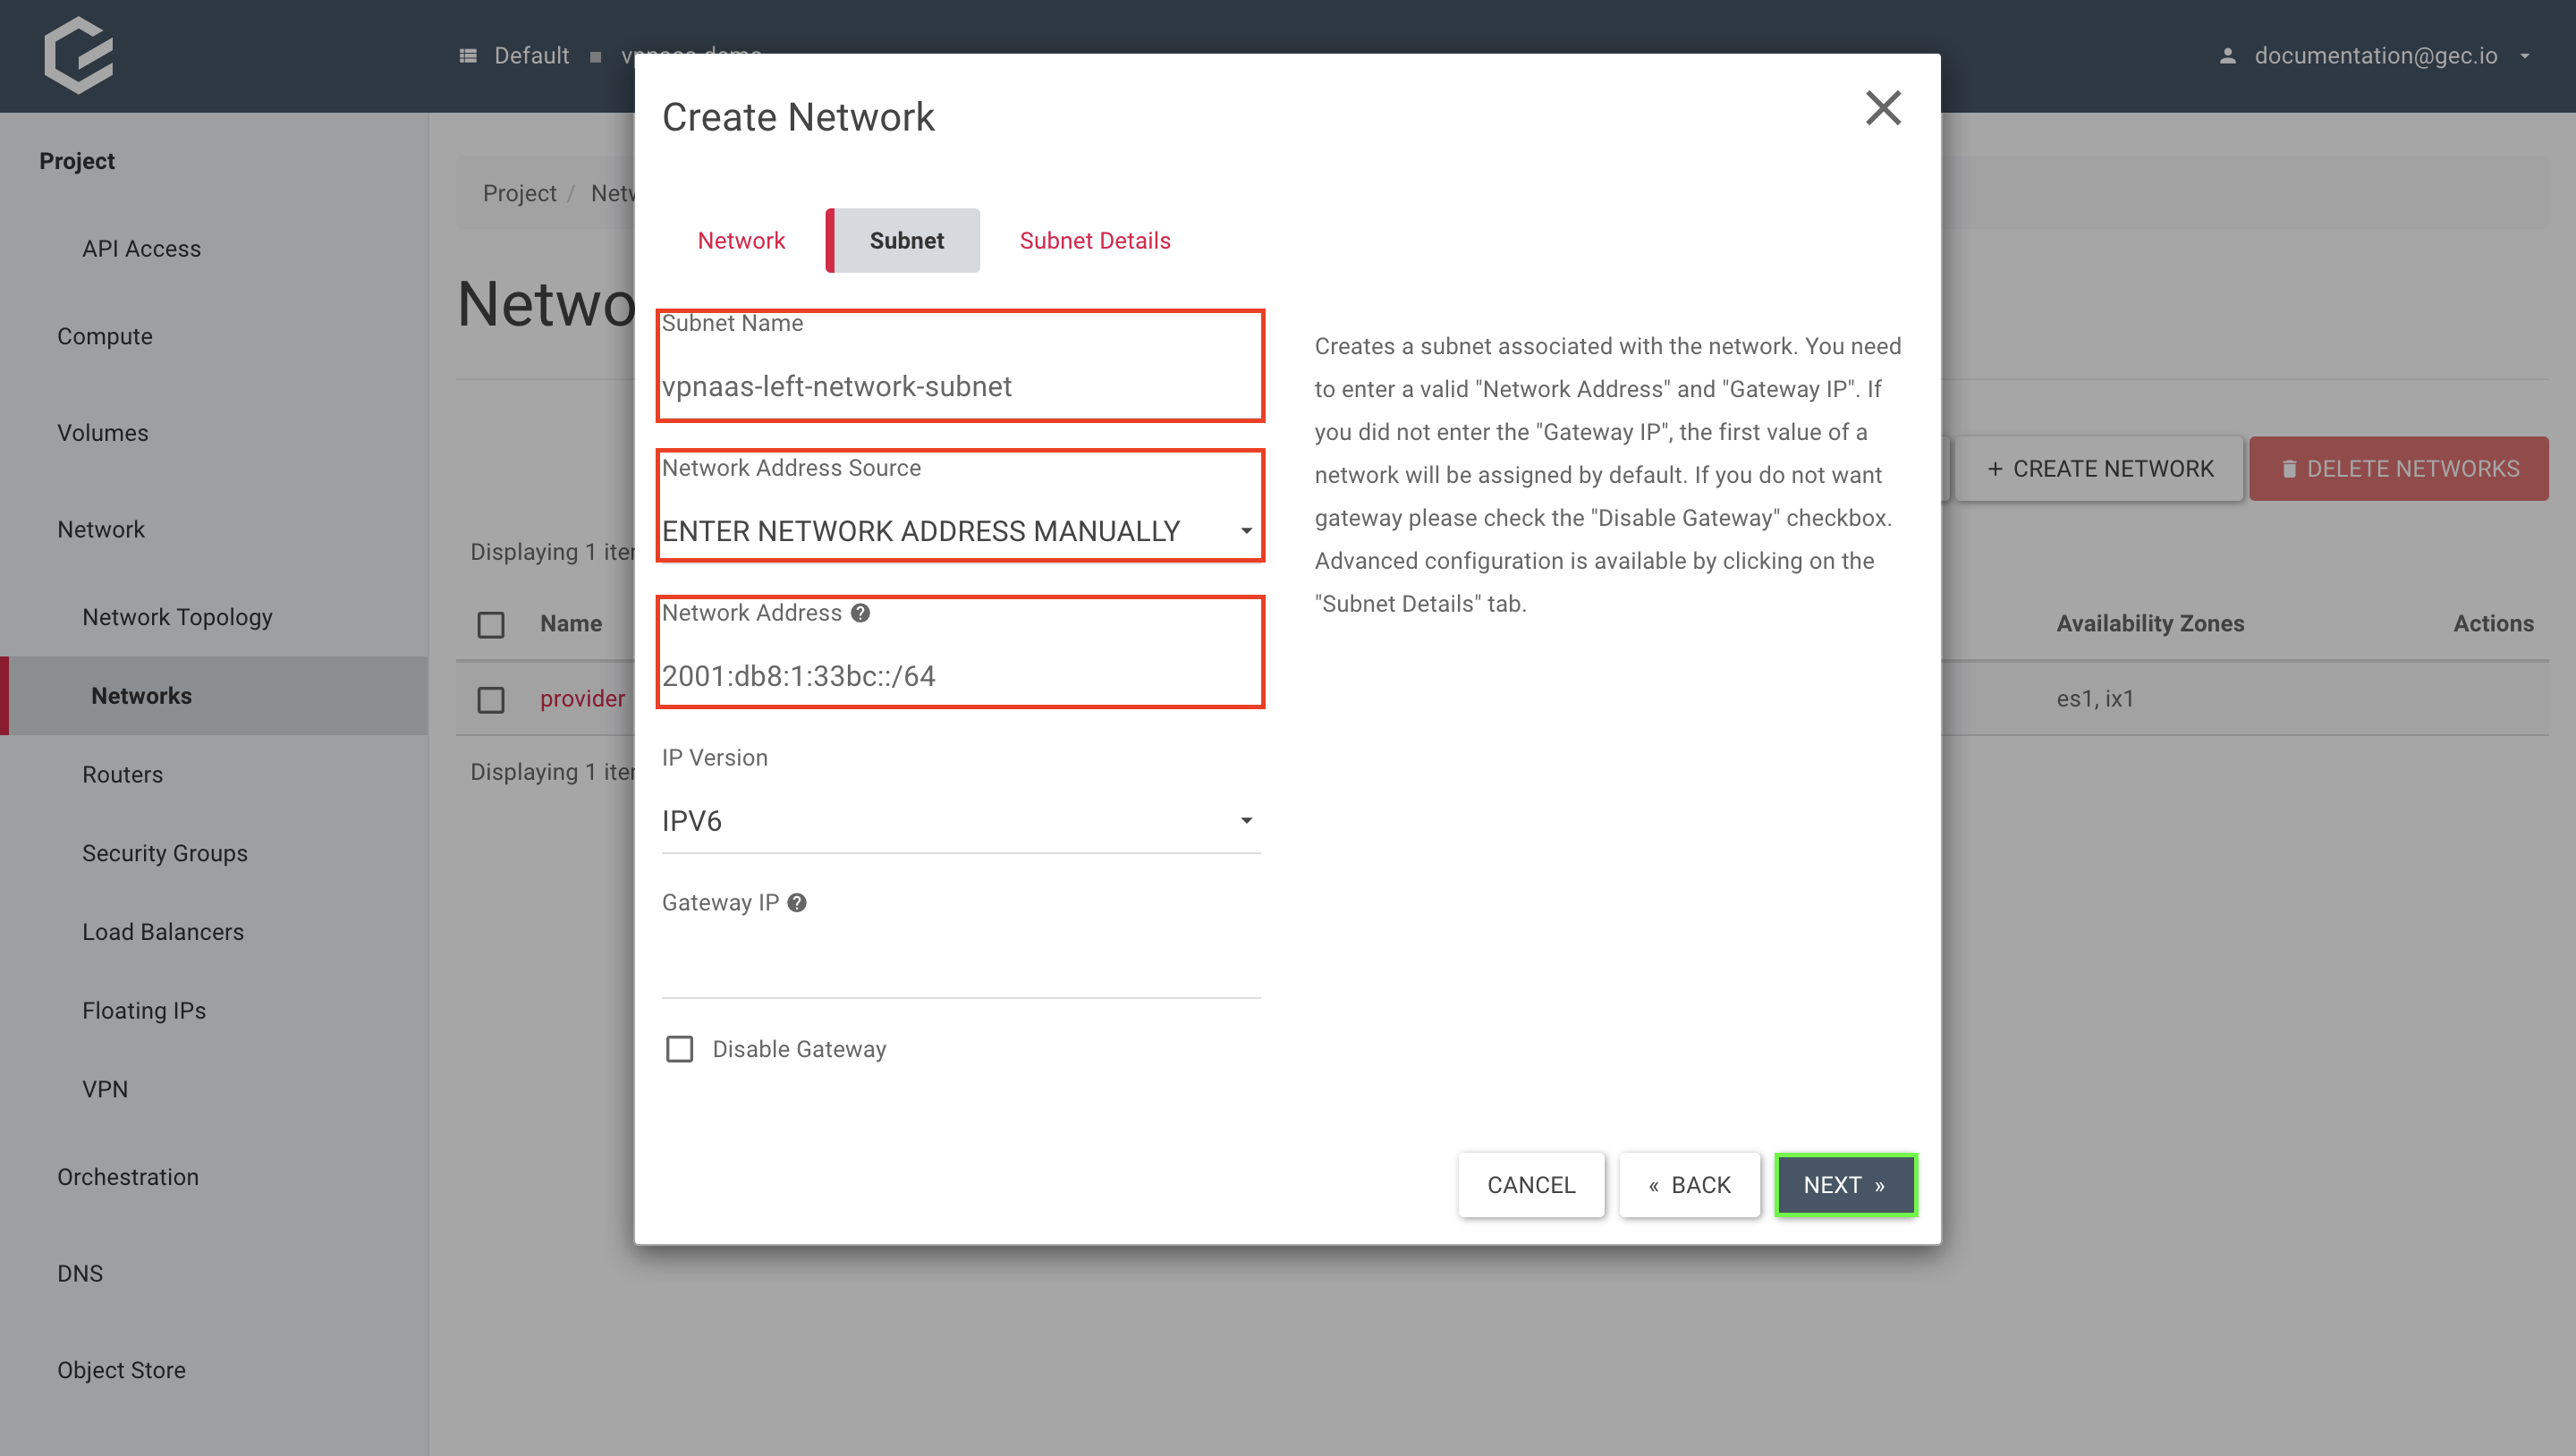
Assign a name to your new network subnet, select Enter Network Address manually and enter your desired subnet within Network Address, if you would like to use your own subnet. To use a subnet from a predefined pool instead, select Allocate Network Address from a pool and pick a pool. Click Next.
For documentation purposes, we will be using our own previously mentioned prefixes.
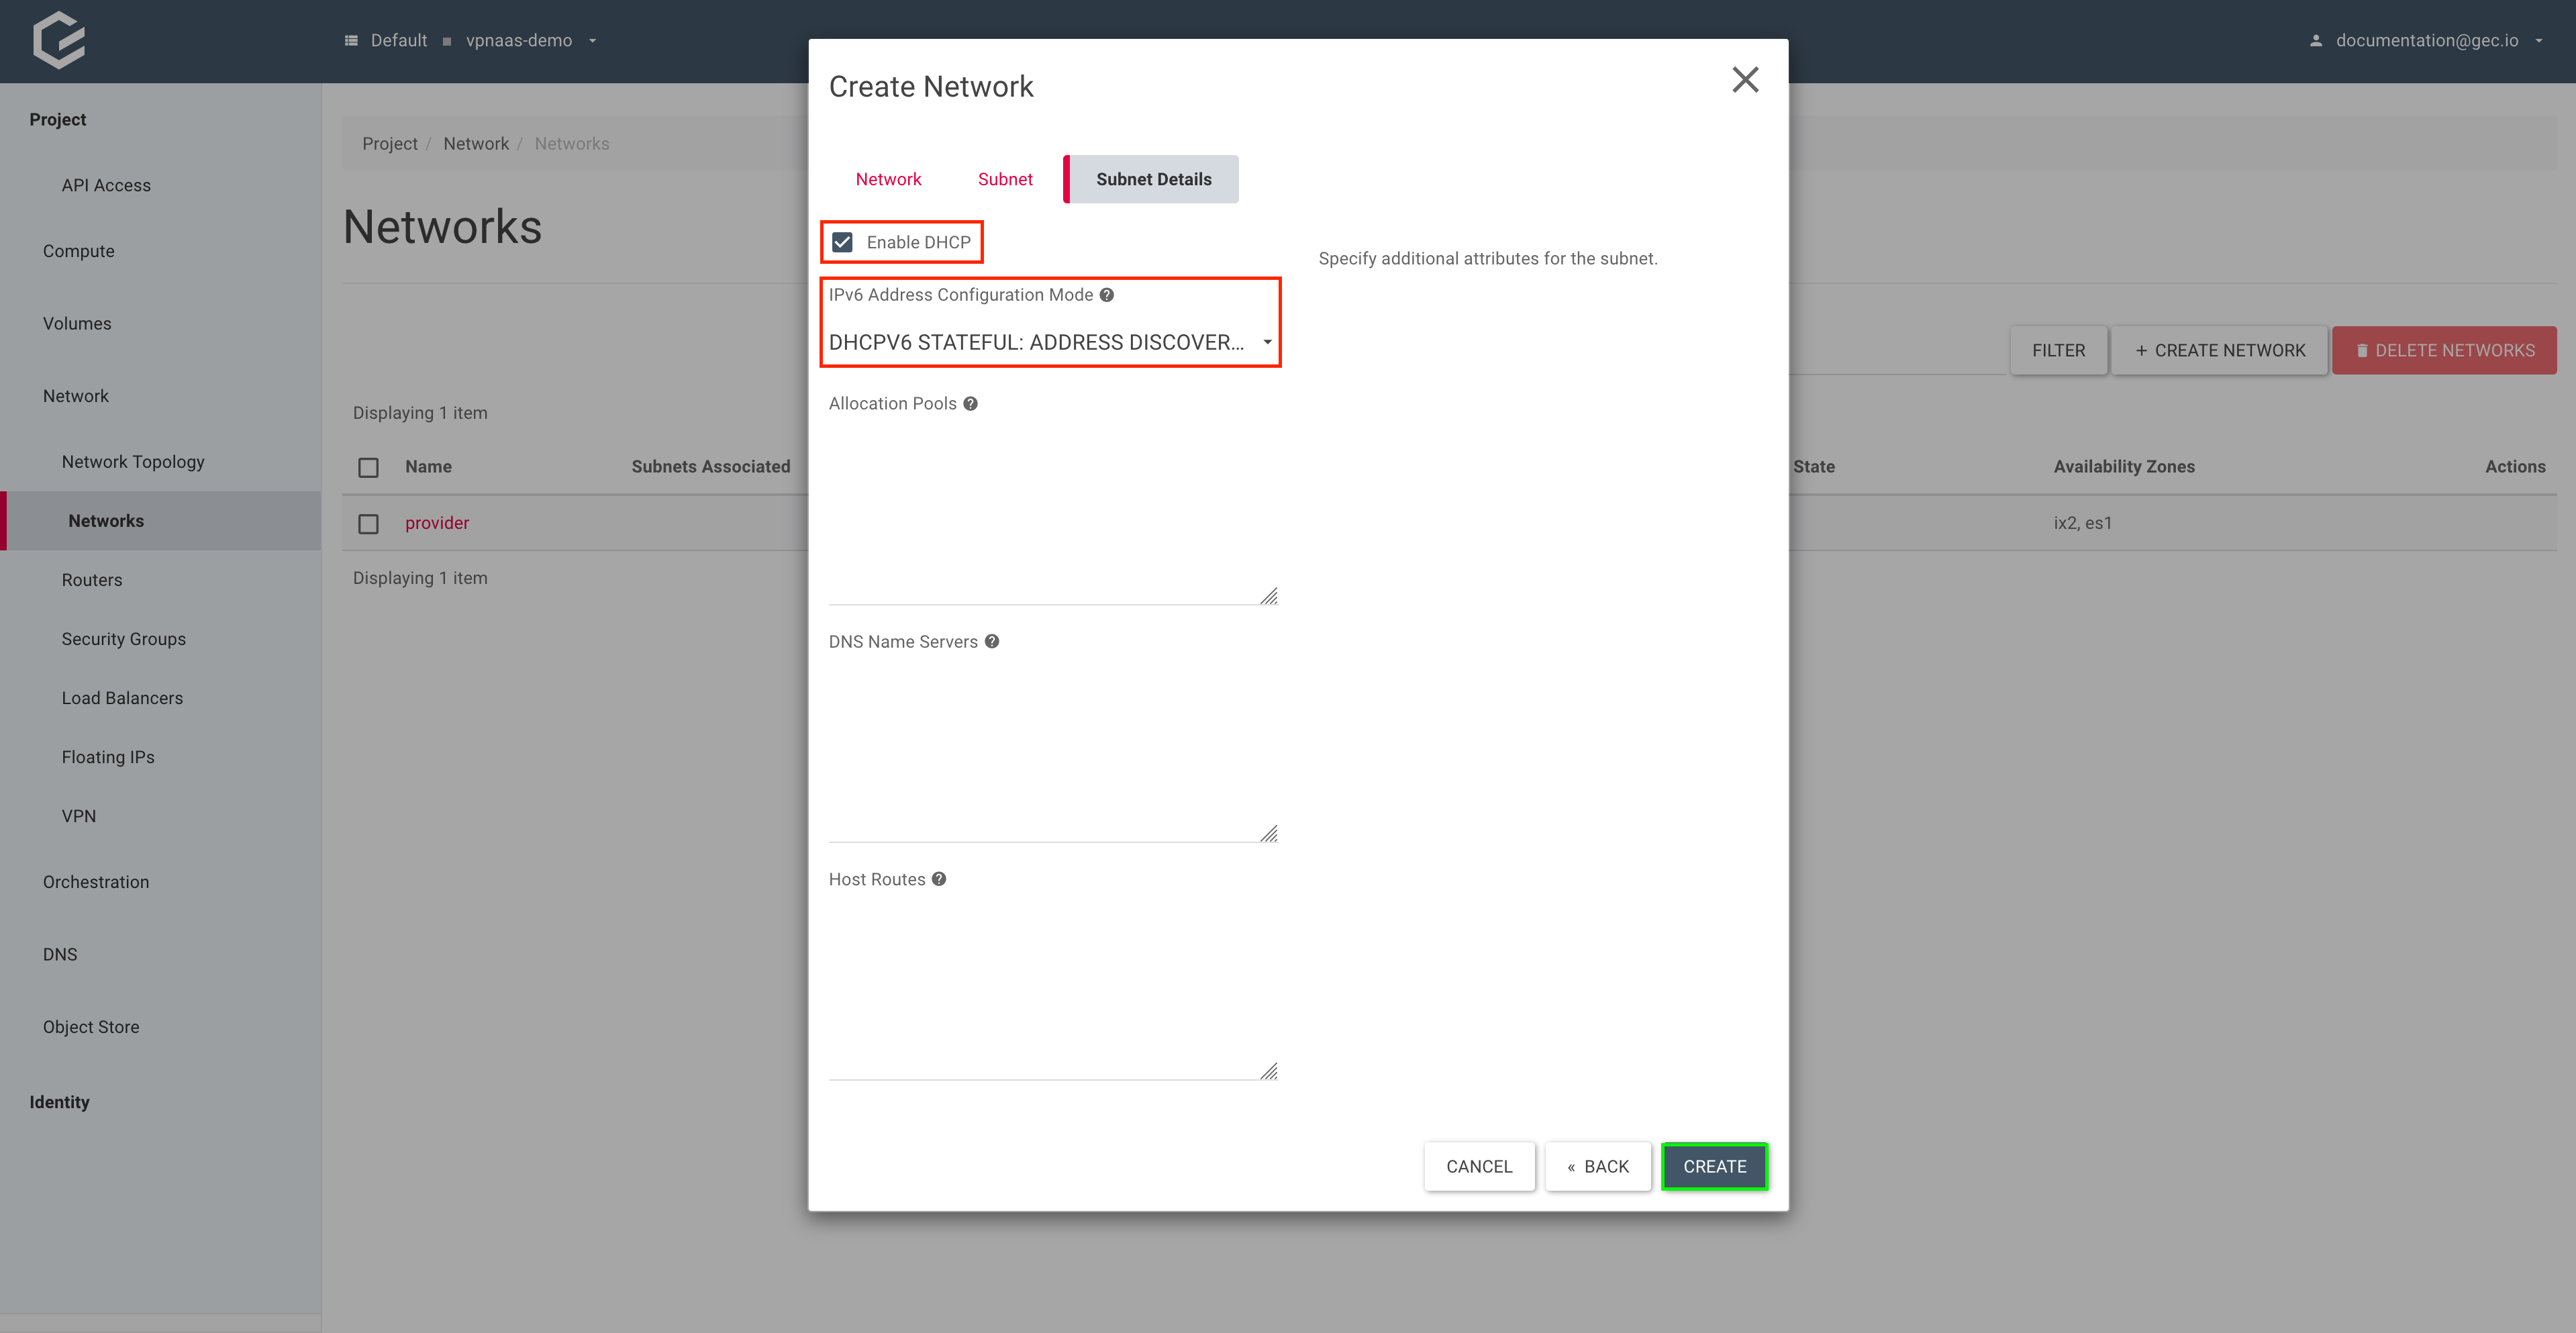
Select Enable DHCP and IPv6 Address Configuration Mode “DHCPV6 STATEFUL”. Allocation pools will be generated automatically. Click Create.
Using the CLI
- Create the left network using the
openstack network createcommand.
$ openstack network create vpnaas-left-network
+---------------------------+--------------------------------------+
| Field                     | Value                                |
+---------------------------+--------------------------------------+
| admin_state_up            | UP                                   |
| availability_zone_hints   |                                      |
| availability_zones        |                                      |
| created_at                | 2022-09-12T12:45:42Z                 |
| description               |                                      |
| dns_domain                |                                      |
| id                        | ff7c61f1-4dcb-49bf-be9f-efdcaa1e0aaa |
| ipv4_address_scope        | None                                 |
| ipv6_address_scope        | None                                 |
| is_default                | False                                |
| is_vlan_transparent       | None                                 |
| mtu                       | 1500                                 |
| name                      | vpnaas-left-network                  |
| port_security_enabled     | True                                 |
| project_id                | 281fa14f782e4d4cbfd4e34a121c2680     |
| provider:network_type     | None                                 |
| provider:physical_network | None                                 |
| provider:segmentation_id  | None                                 |
| qos_policy_id             | None                                 |
| revision_number           | 1                                    |
| router:external           | Internal                             |
| segments                  | None                                 |
| shared                    | False                                |
| status                    | ACTIVE                               |
| subnets                   |                                      |
| tags                      |                                      |
| updated_at                | 2022-09-12T12:45:42Z                 |
+---------------------------+--------------------------------------+
- Create a new subnet and allocate it to the newly created network, using the
openstack subnet createcommand.
$ openstack subnet create \
  vpnaas-left-network-subnet \
  --subnet-range 2001:db8:1:33bc::/64 --ip-version 6 \
  --network vpnaas-left-network
+----------------------+--------------------------------------------------------+
| Field                | Value                                                  |
+----------------------+--------------------------------------------------------+
| allocation_pools     | 2001:db8:1:33bc::1-2001:db8:1:33bc:ffff:ffff:ffff:ffff |
| cidr                 | 2001:db8:1:33bc::/64                                   |
| created_at           | 2022-09-12T12:47:51Z                                   |
| description          |                                                        |
| dns_nameservers      |                                                        |
| dns_publish_fixed_ip | None                                                   |
| enable_dhcp          | True                                                   |
| gateway_ip           | 2001:db8:1:33bc::                                      |
| host_routes          |                                                        |
| id                   | e217a377-48c7-4c18-93b5-cfd805bde40a                   |
| ip_version           | 6                                                      |
| ipv6_address_mode    | None                                                   |
| ipv6_ra_mode         | None                                                   |
| name                 | vpnaas-left-network-subnet                             |
| network_id           | ff7c61f1-4dcb-49bf-be9f-efdcaa1e0aaa                   |
| project_id           | 281fa14f782e4d4cbfd4e34a121c2680                       |
| revision_number      | 0                                                      |
| segment_id           | None                                                   |
| service_types        |                                                        |
| subnetpool_id        | None                                                   |
| tags                 |                                                        |
| updated_at           | 2022-09-12T12:47:51Z                                   |
+----------------------+--------------------------------------------------------+
Create left and right routers
Using Horizon (GUI)
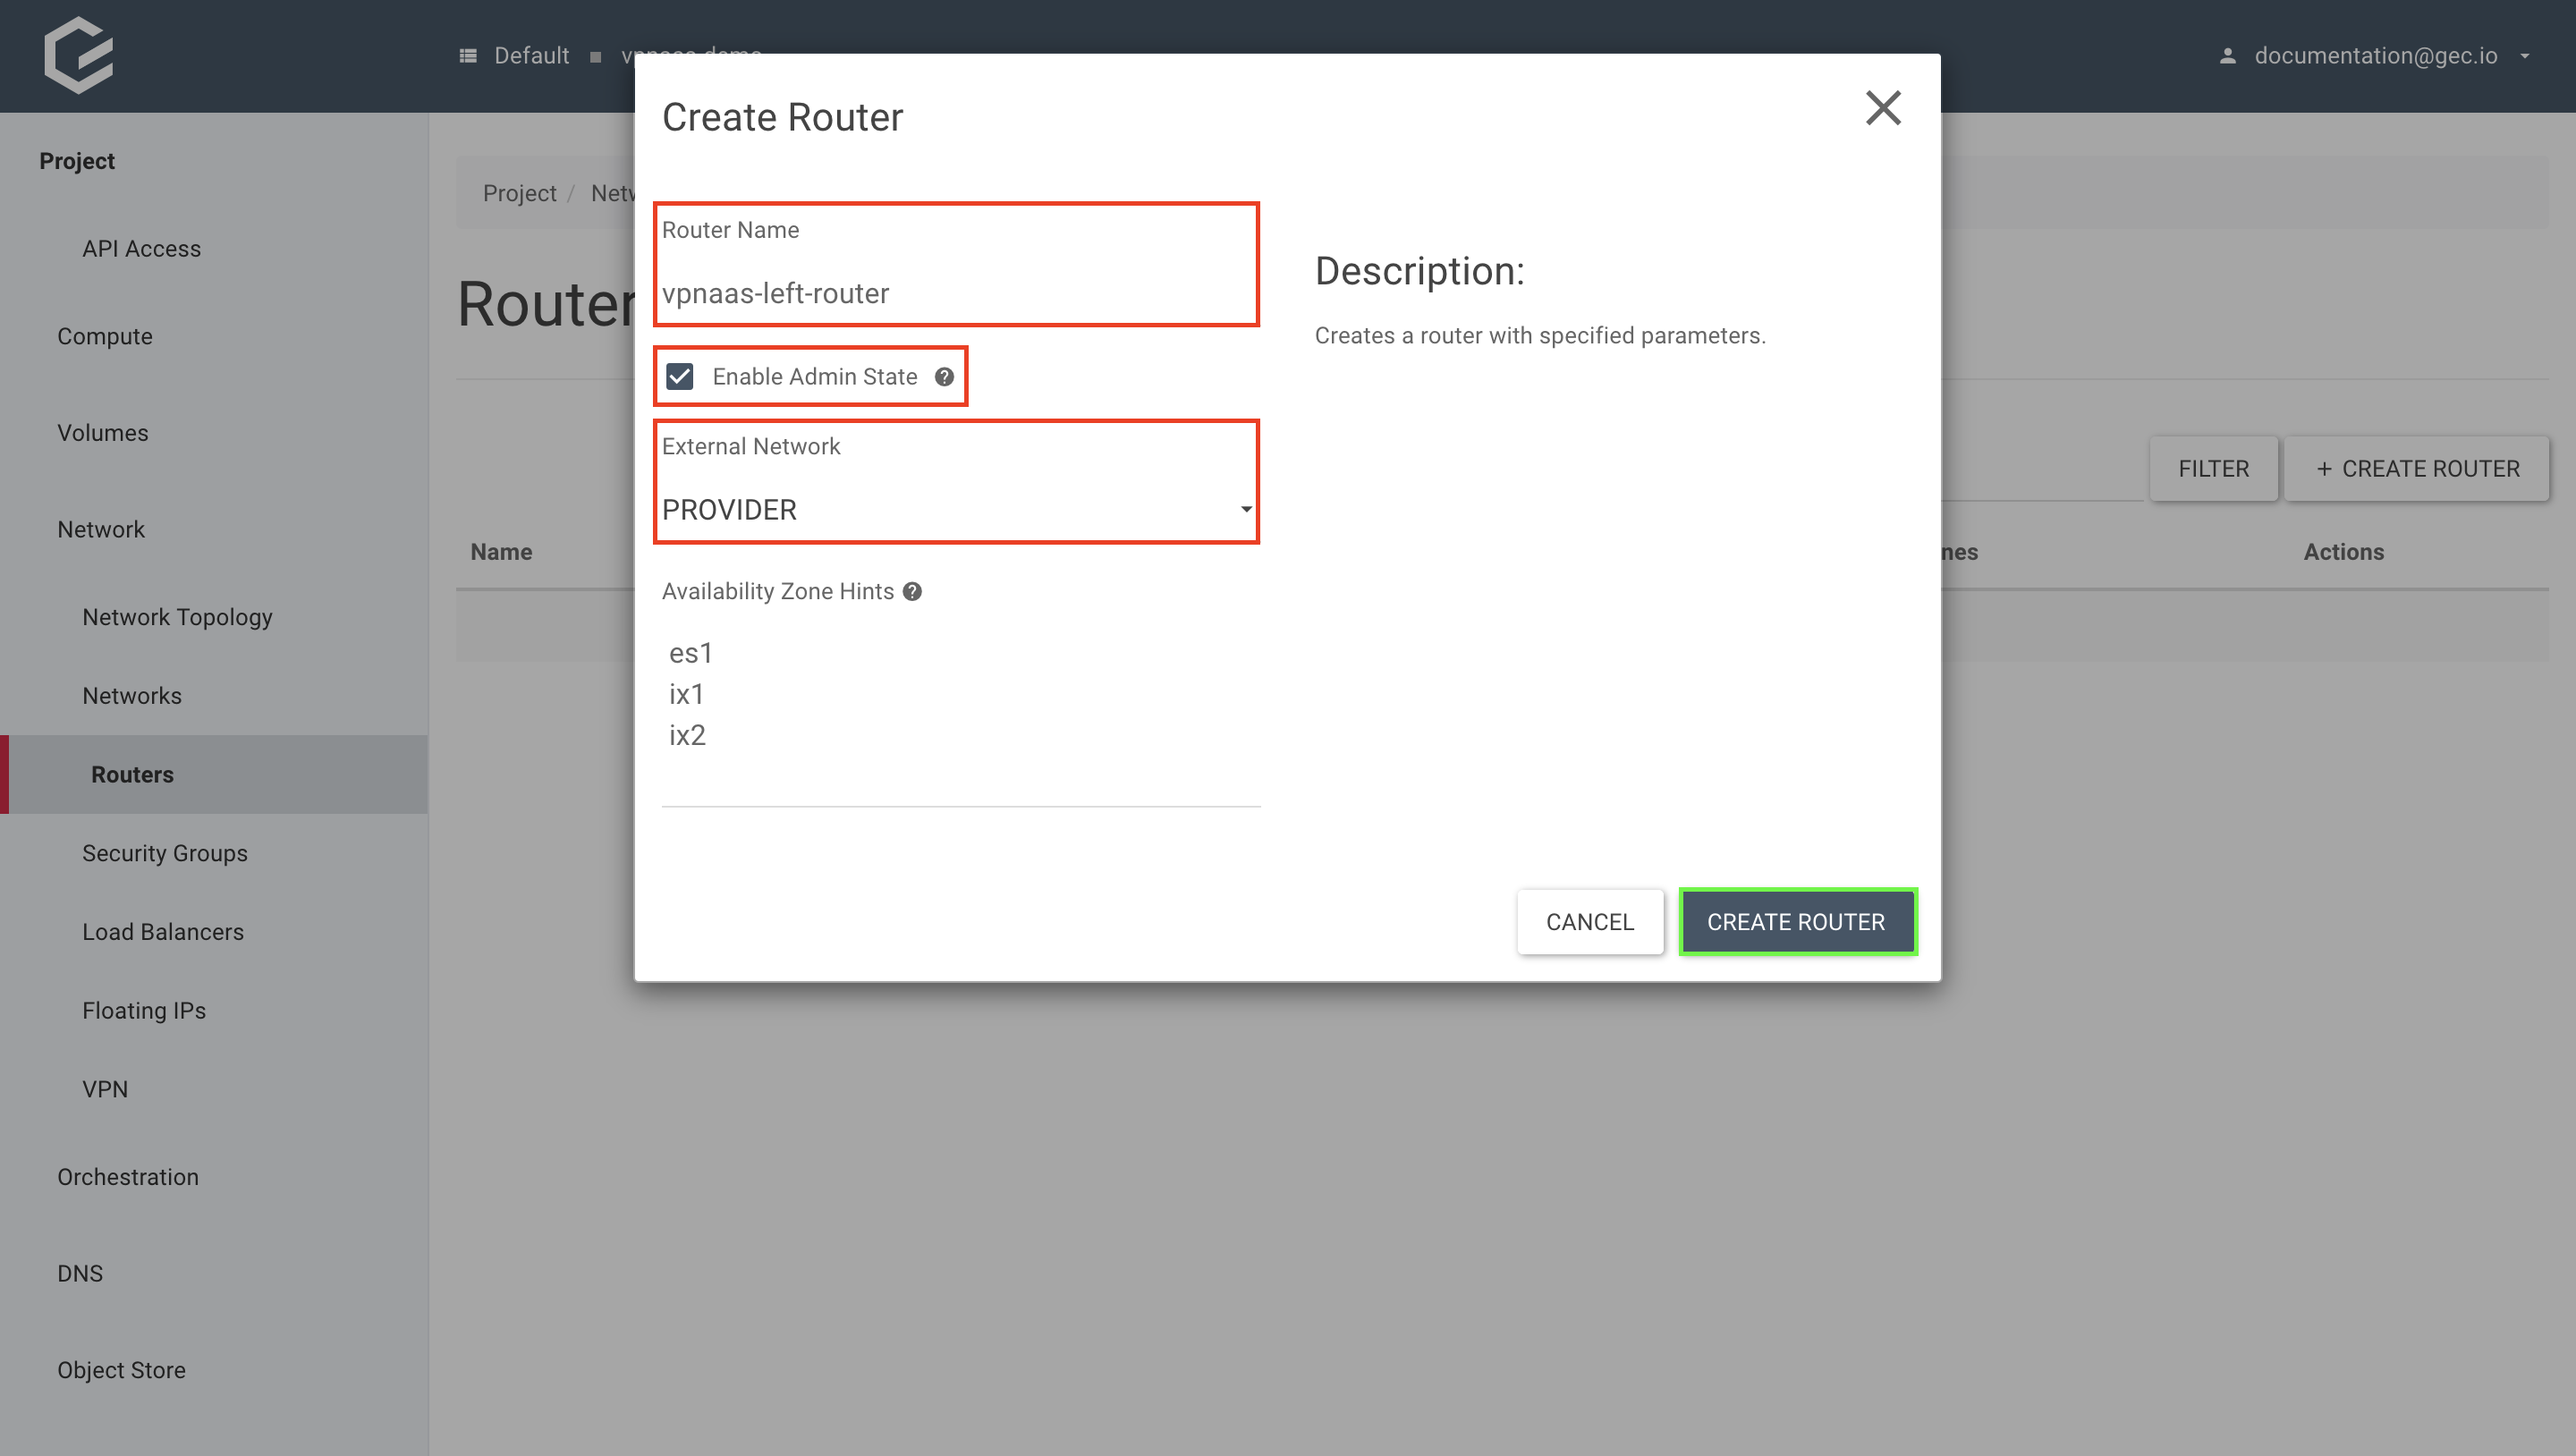
- Create a router with the provider network as an external gateway.
Within your project, navigate to Network → Routers and click Create Router.
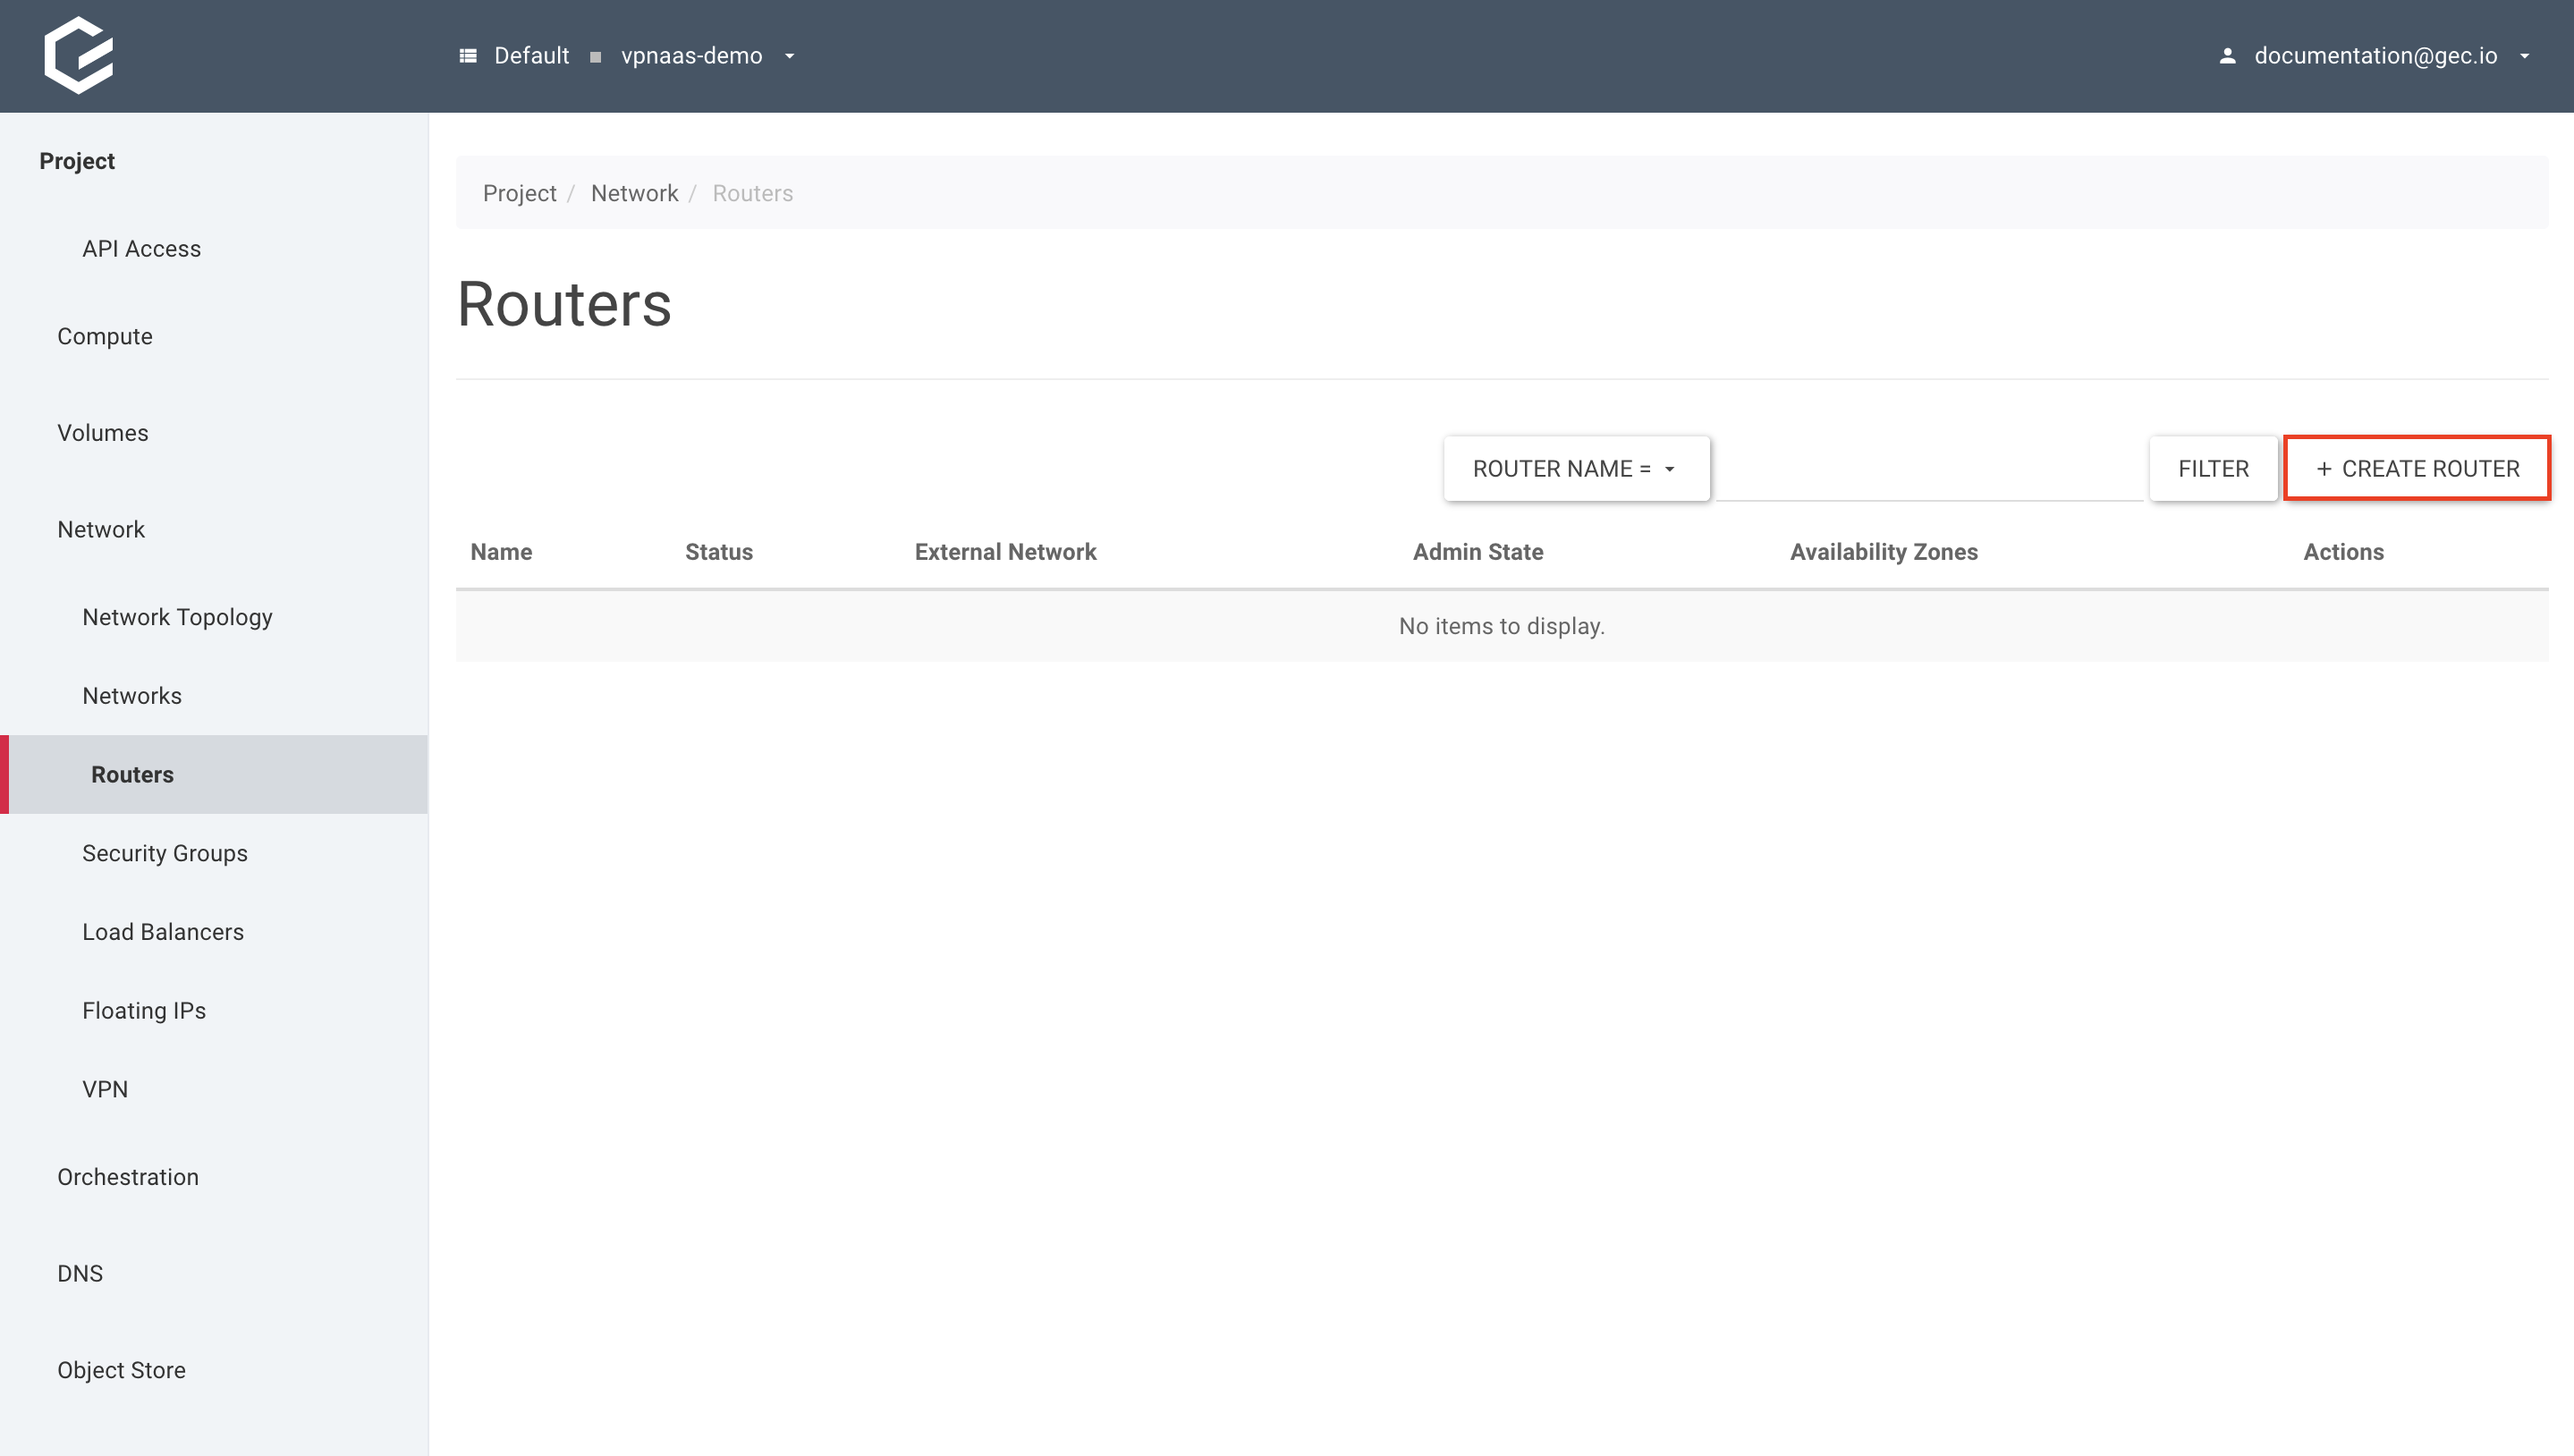
Give your new router a name, select Enable Admin State to enable the router and “PROVIDER” as “External Network”. Click Create Router.
Using the CLI
- Create a router using the
openstack router createcommand.
$ openstack router create vpnaas-left-router
+-------------------------+--------------------------------------+
| Field                   | Value                                |
+-------------------------+--------------------------------------+
| admin_state_up          | UP                                   |
| availability_zone_hints |                                      |
| availability_zones      |                                      |
| created_at              | 2022-09-12T12:48:15Z                 |
| description             |                                      |
| enable_ndp_proxy        | None                                 |
| external_gateway_info   | null                                 |
| flavor_id               | None                                 |
| id                      | 052e968a-a63b-4824-b904-eb70c42c53e5 |
| name                    | vpnaas-left-router                   |
| project_id              | 281fa14f782e4d4cbfd4e34a121c2680     |
| revision_number         | 2                                    |
| routes                  |                                      |
| status                  | ACTIVE                               |
| tags                    |                                      |
| tenant_id               | 281fa14f782e4d4cbfd4e34a121c2680     |
| updated_at              | 2022-09-12T12:48:15Z                 |
+-------------------------+--------------------------------------+
- Use the
openstack router setcommand to set the provider network as an external gateway for the router.
$ openstack router set vpnaas-left-router --external-gateway provider
Attach the subnet to the router
Using Horizon (GUI)
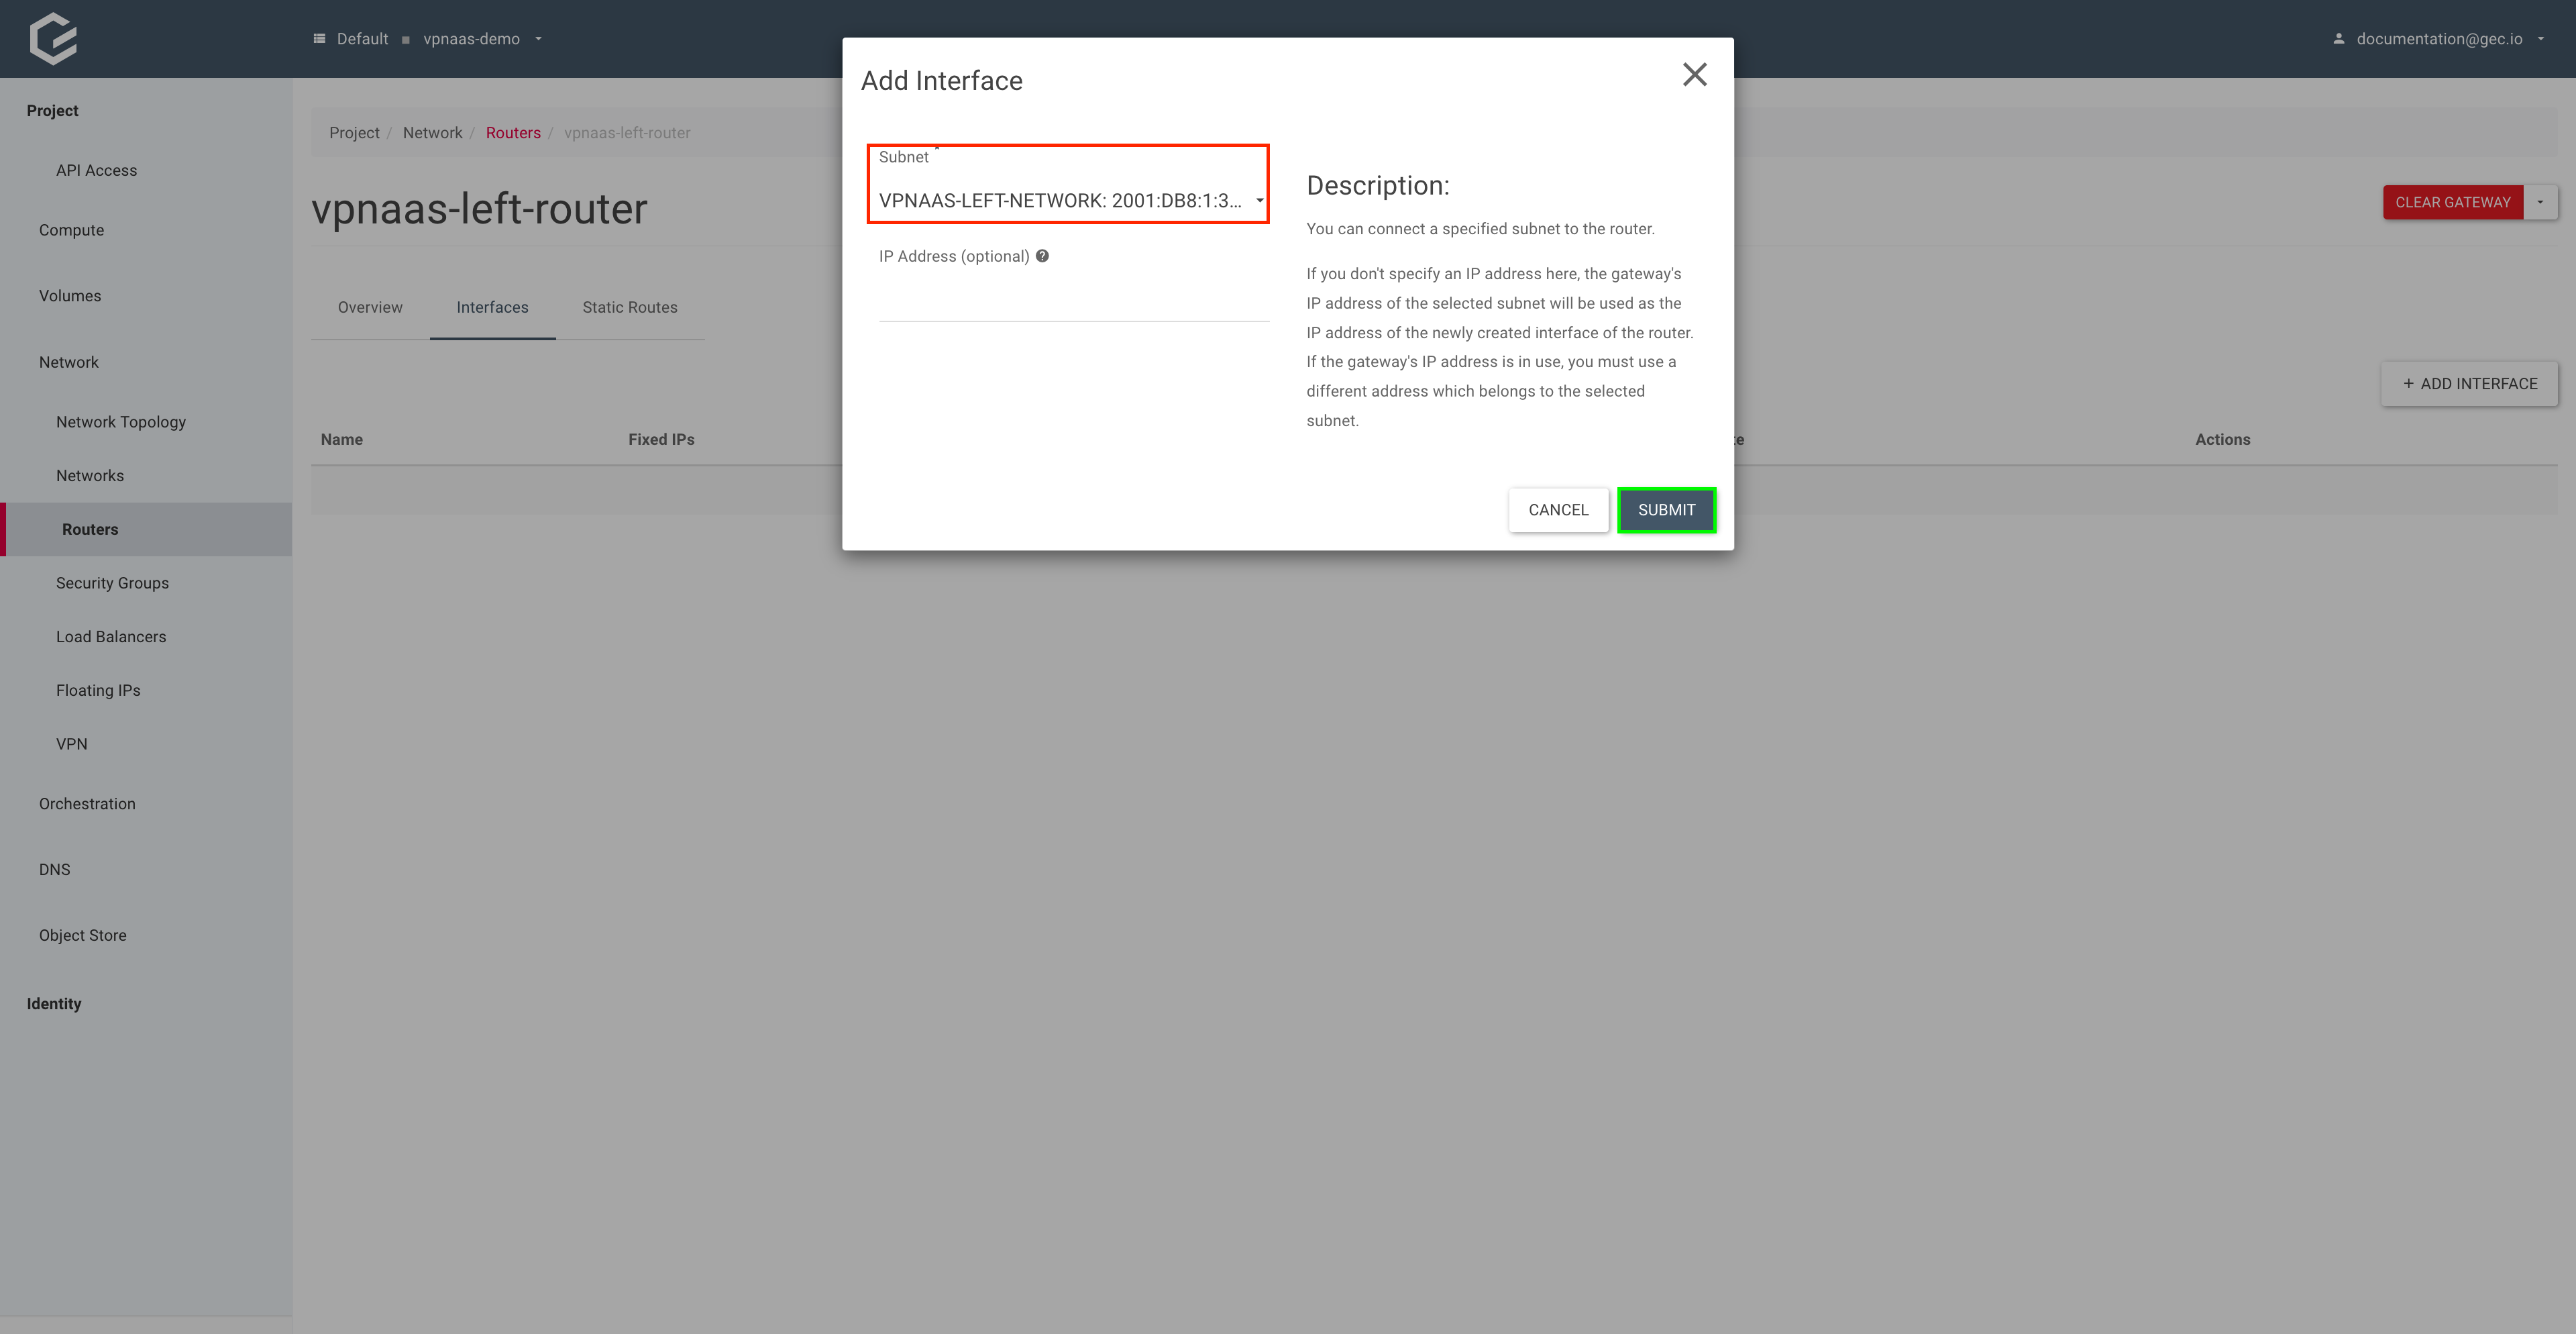
Within your project, navigate to Network → Routers and select the previously created router.

Select Interfaces and click Add Interface.
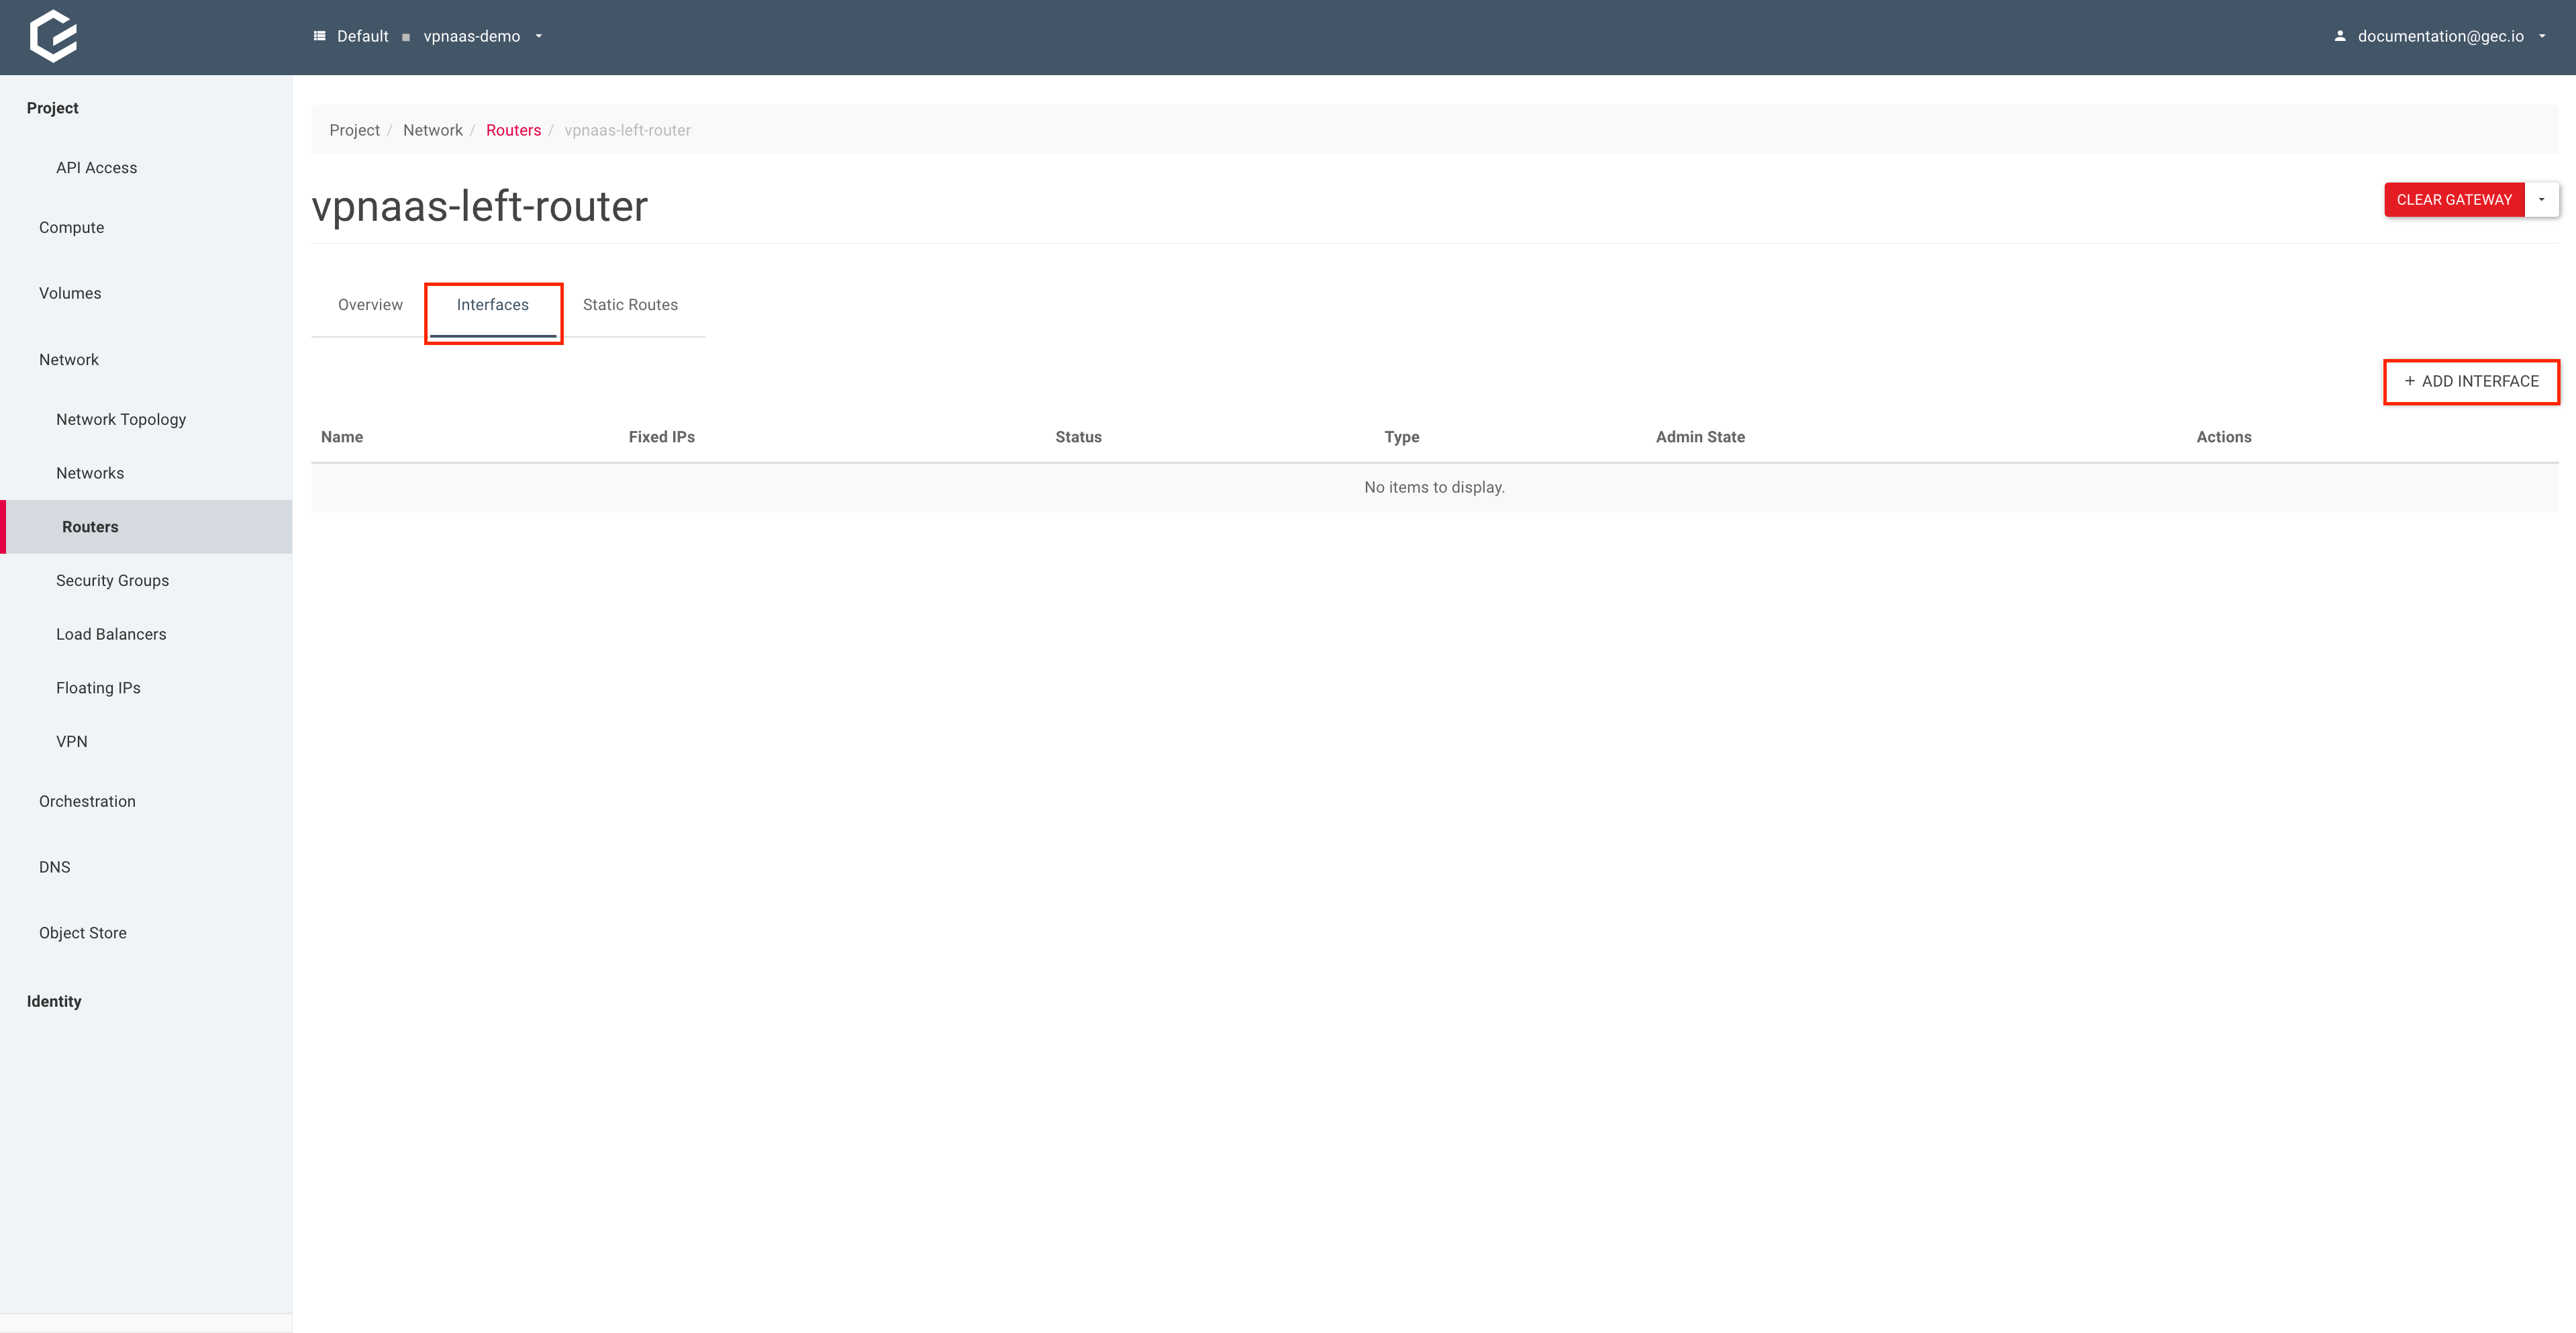
Select your subnet and click Submit.
Using the CLI
Use the openstack router add subnet command to add the subnet to the router.
$ openstack router add subnet vpnaas-left-router vpnaas-left-network-subnet
Create IKE and IPSec policies on both sides
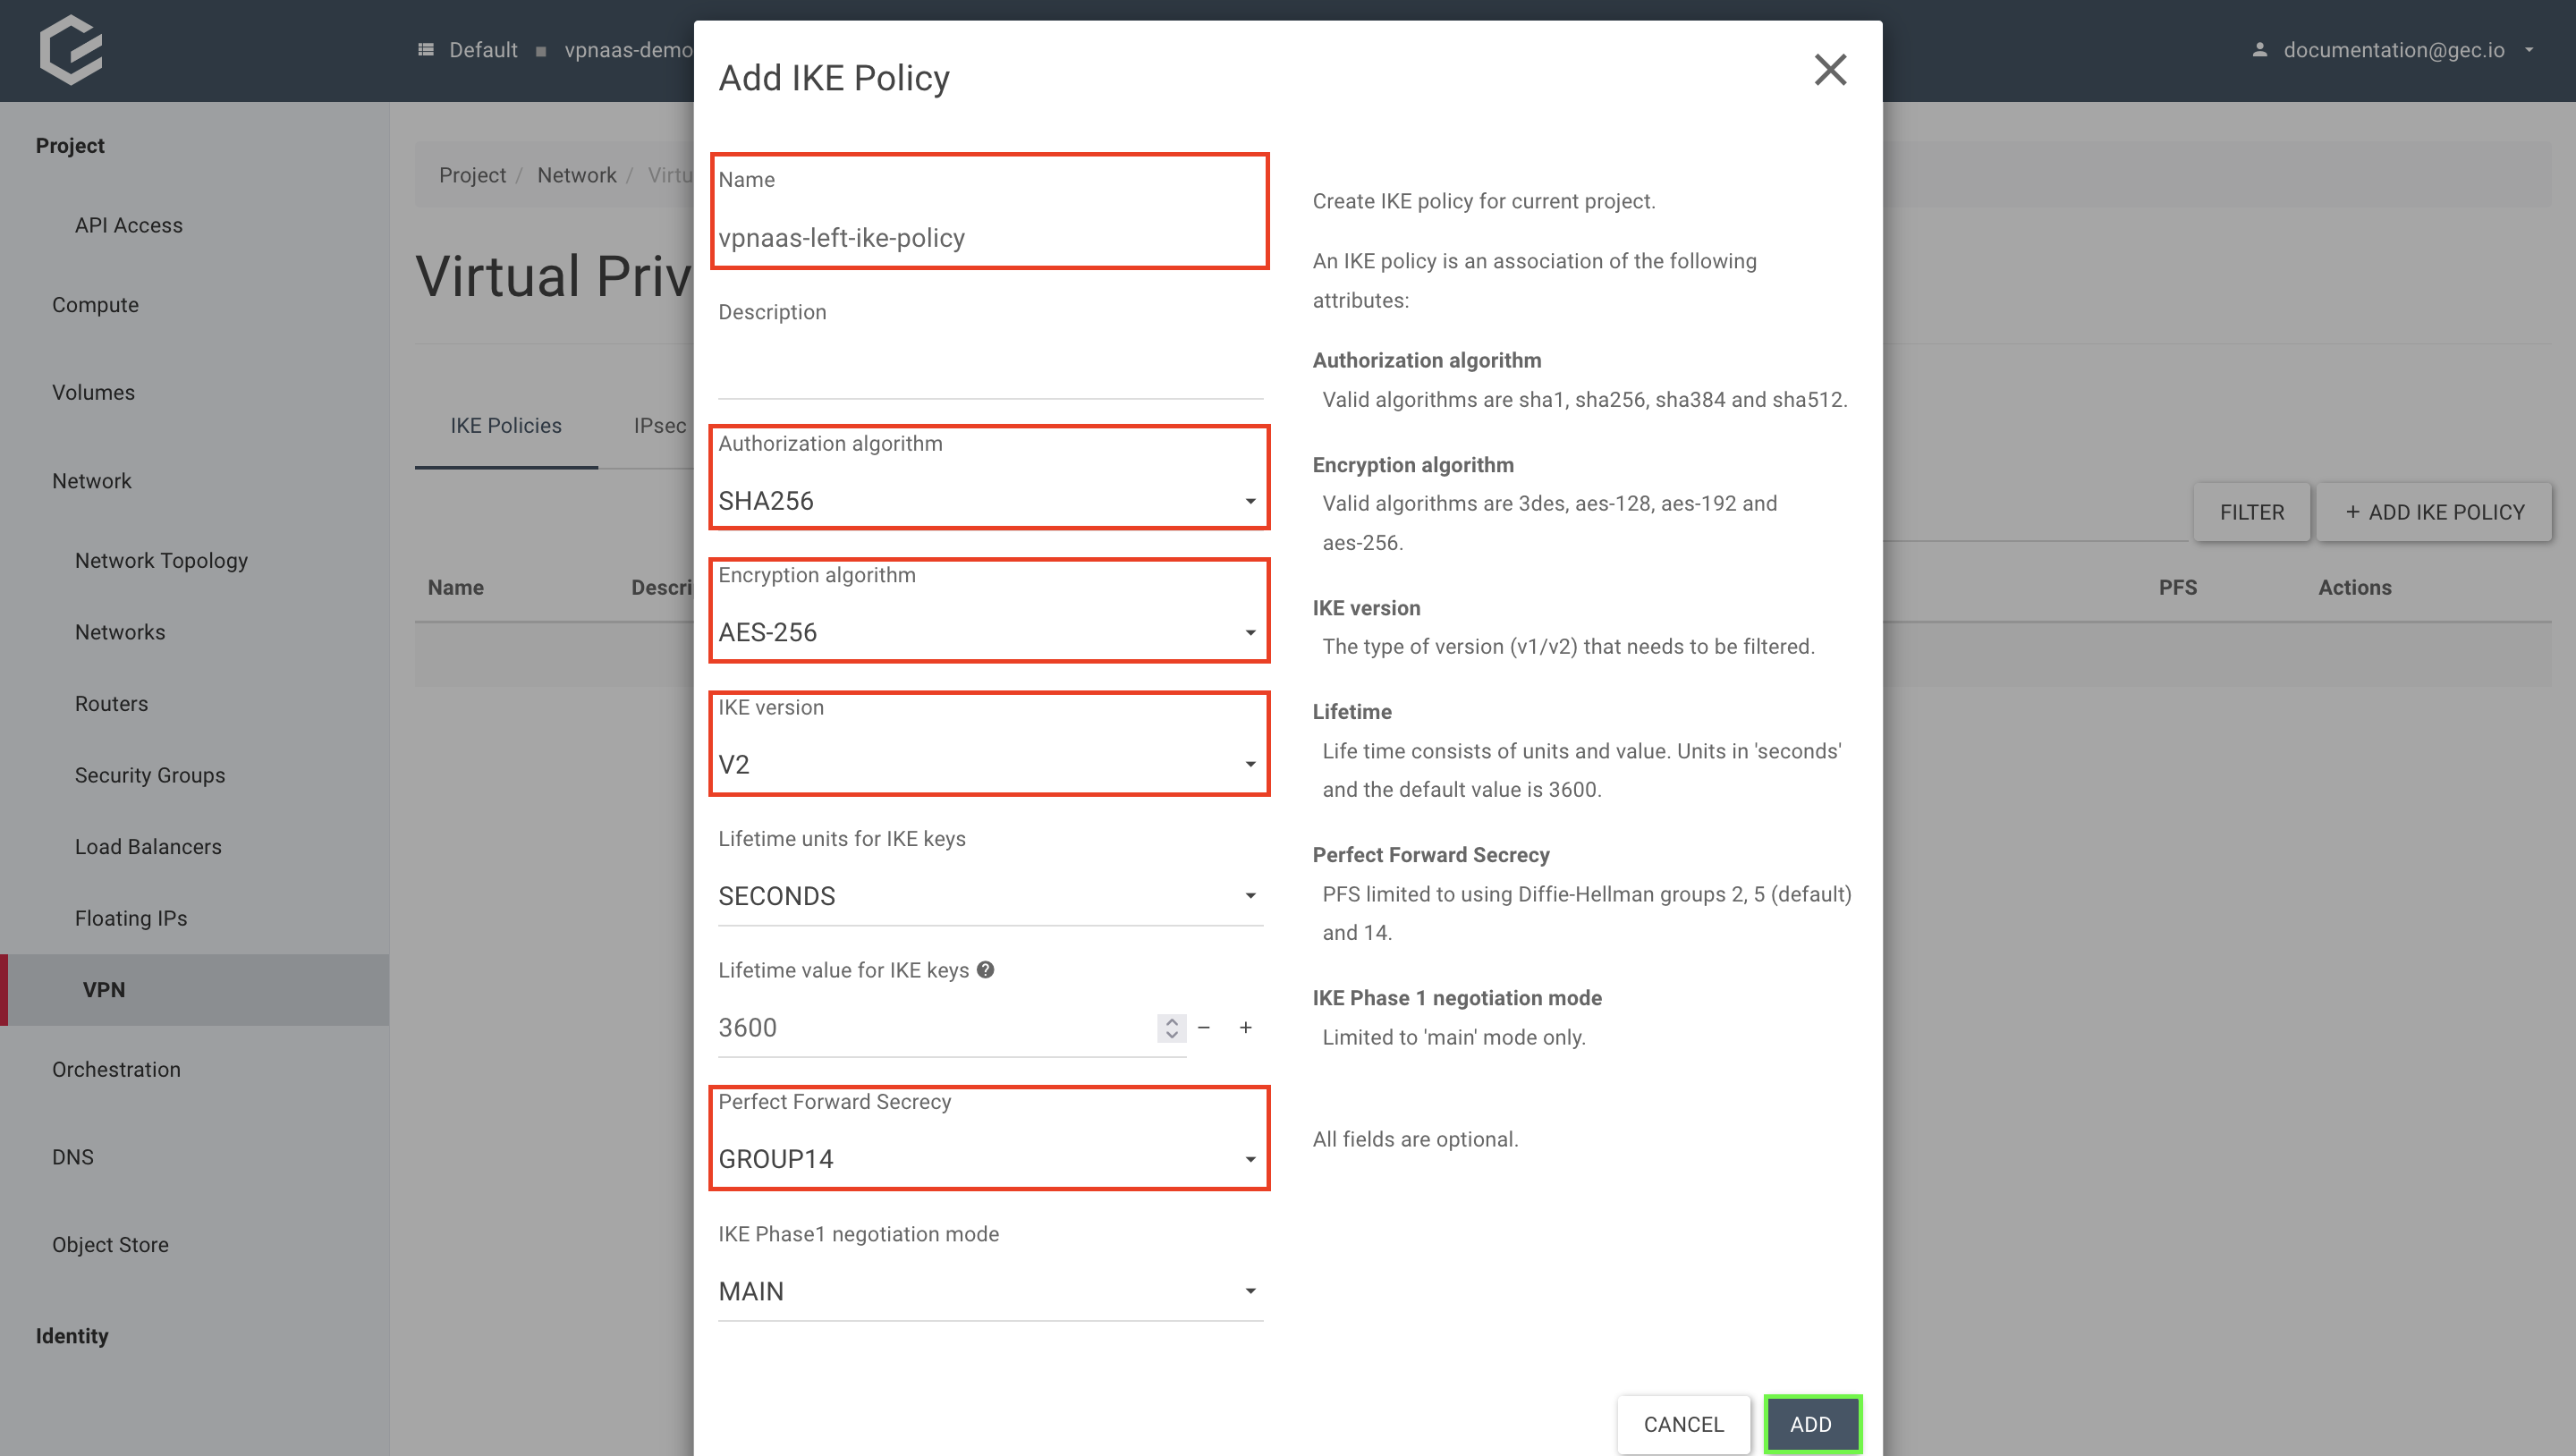
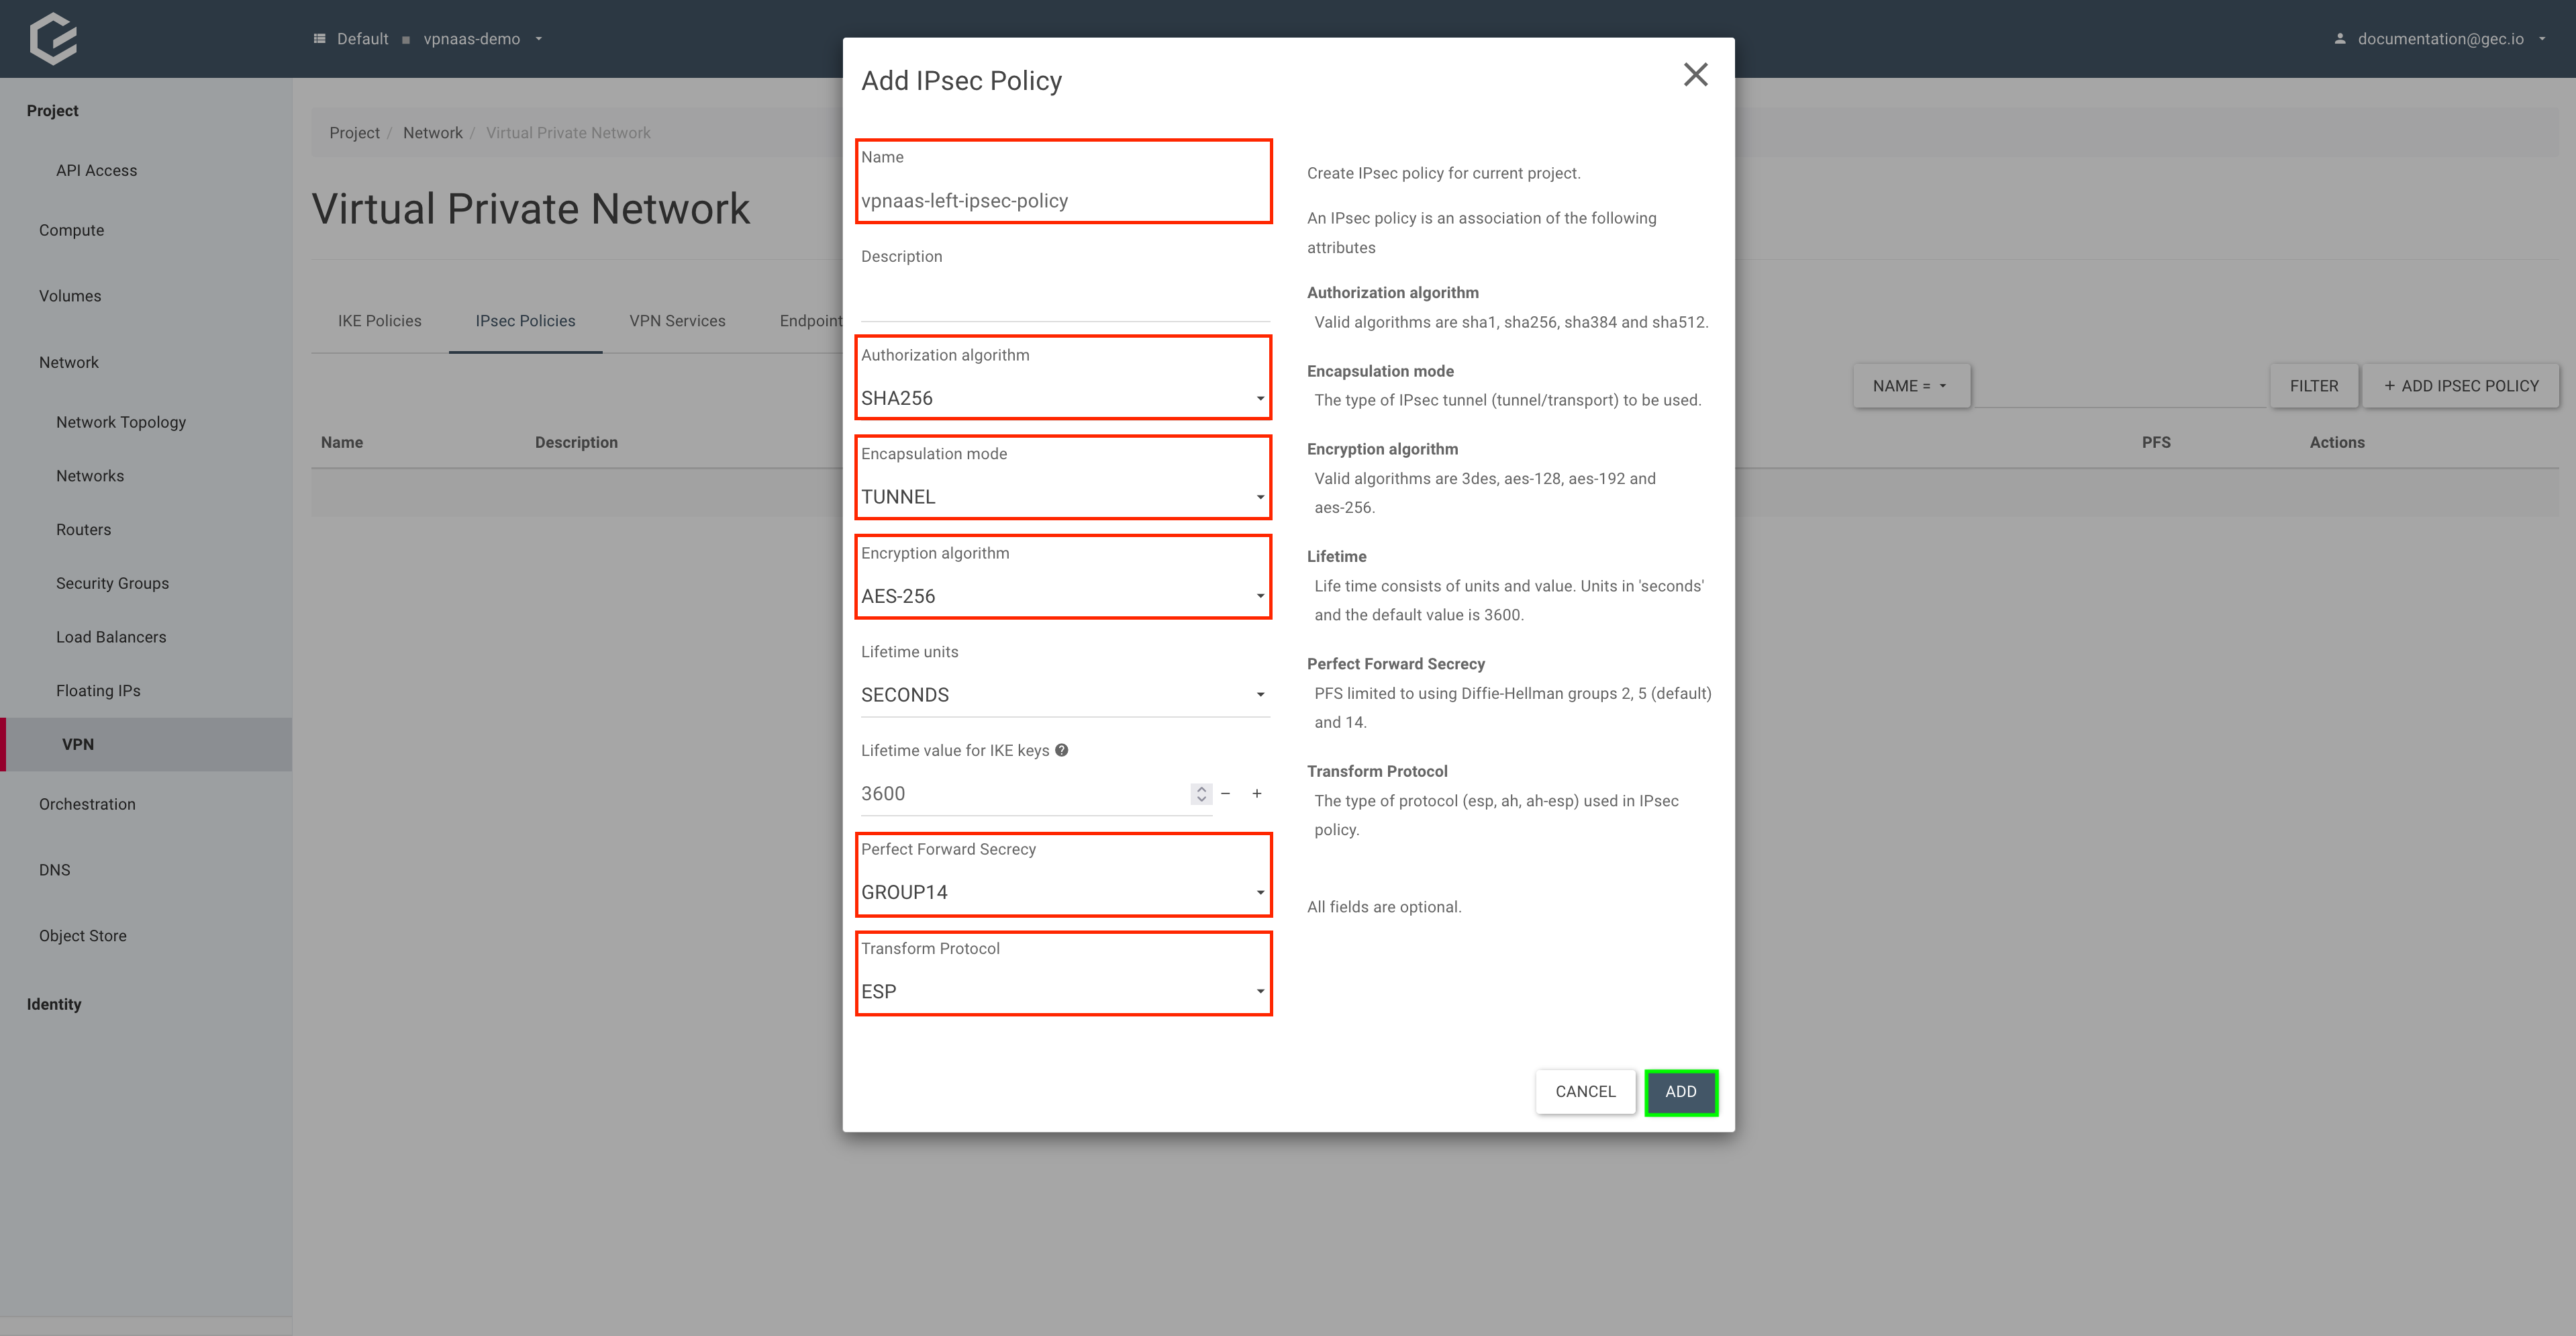
The IKE and IPSec policies need to be configured identically on both sides. For the purpose of this guide, we will be using the following parameters.
| Parameter | IKE Policy | IPSec Policy |
|---|---|---|
| Authorization algorithm | SHA256 | SHA256 |
| Encryption algorithm | AES-256 | AES-256 |
| Encapsulation mode | N/A | TUNNEL |
| IKE Version | V2 | N/A |
| Perfect Forward Secrecy | GROUP14 | GROUP14 |
| Transform Protocol | N/A | ESP |
Using Horizon (GUI)
- Create the IKE policy
Within your project, navigate to Network → VPN, select IKE Policies and click Add IKE Policy.
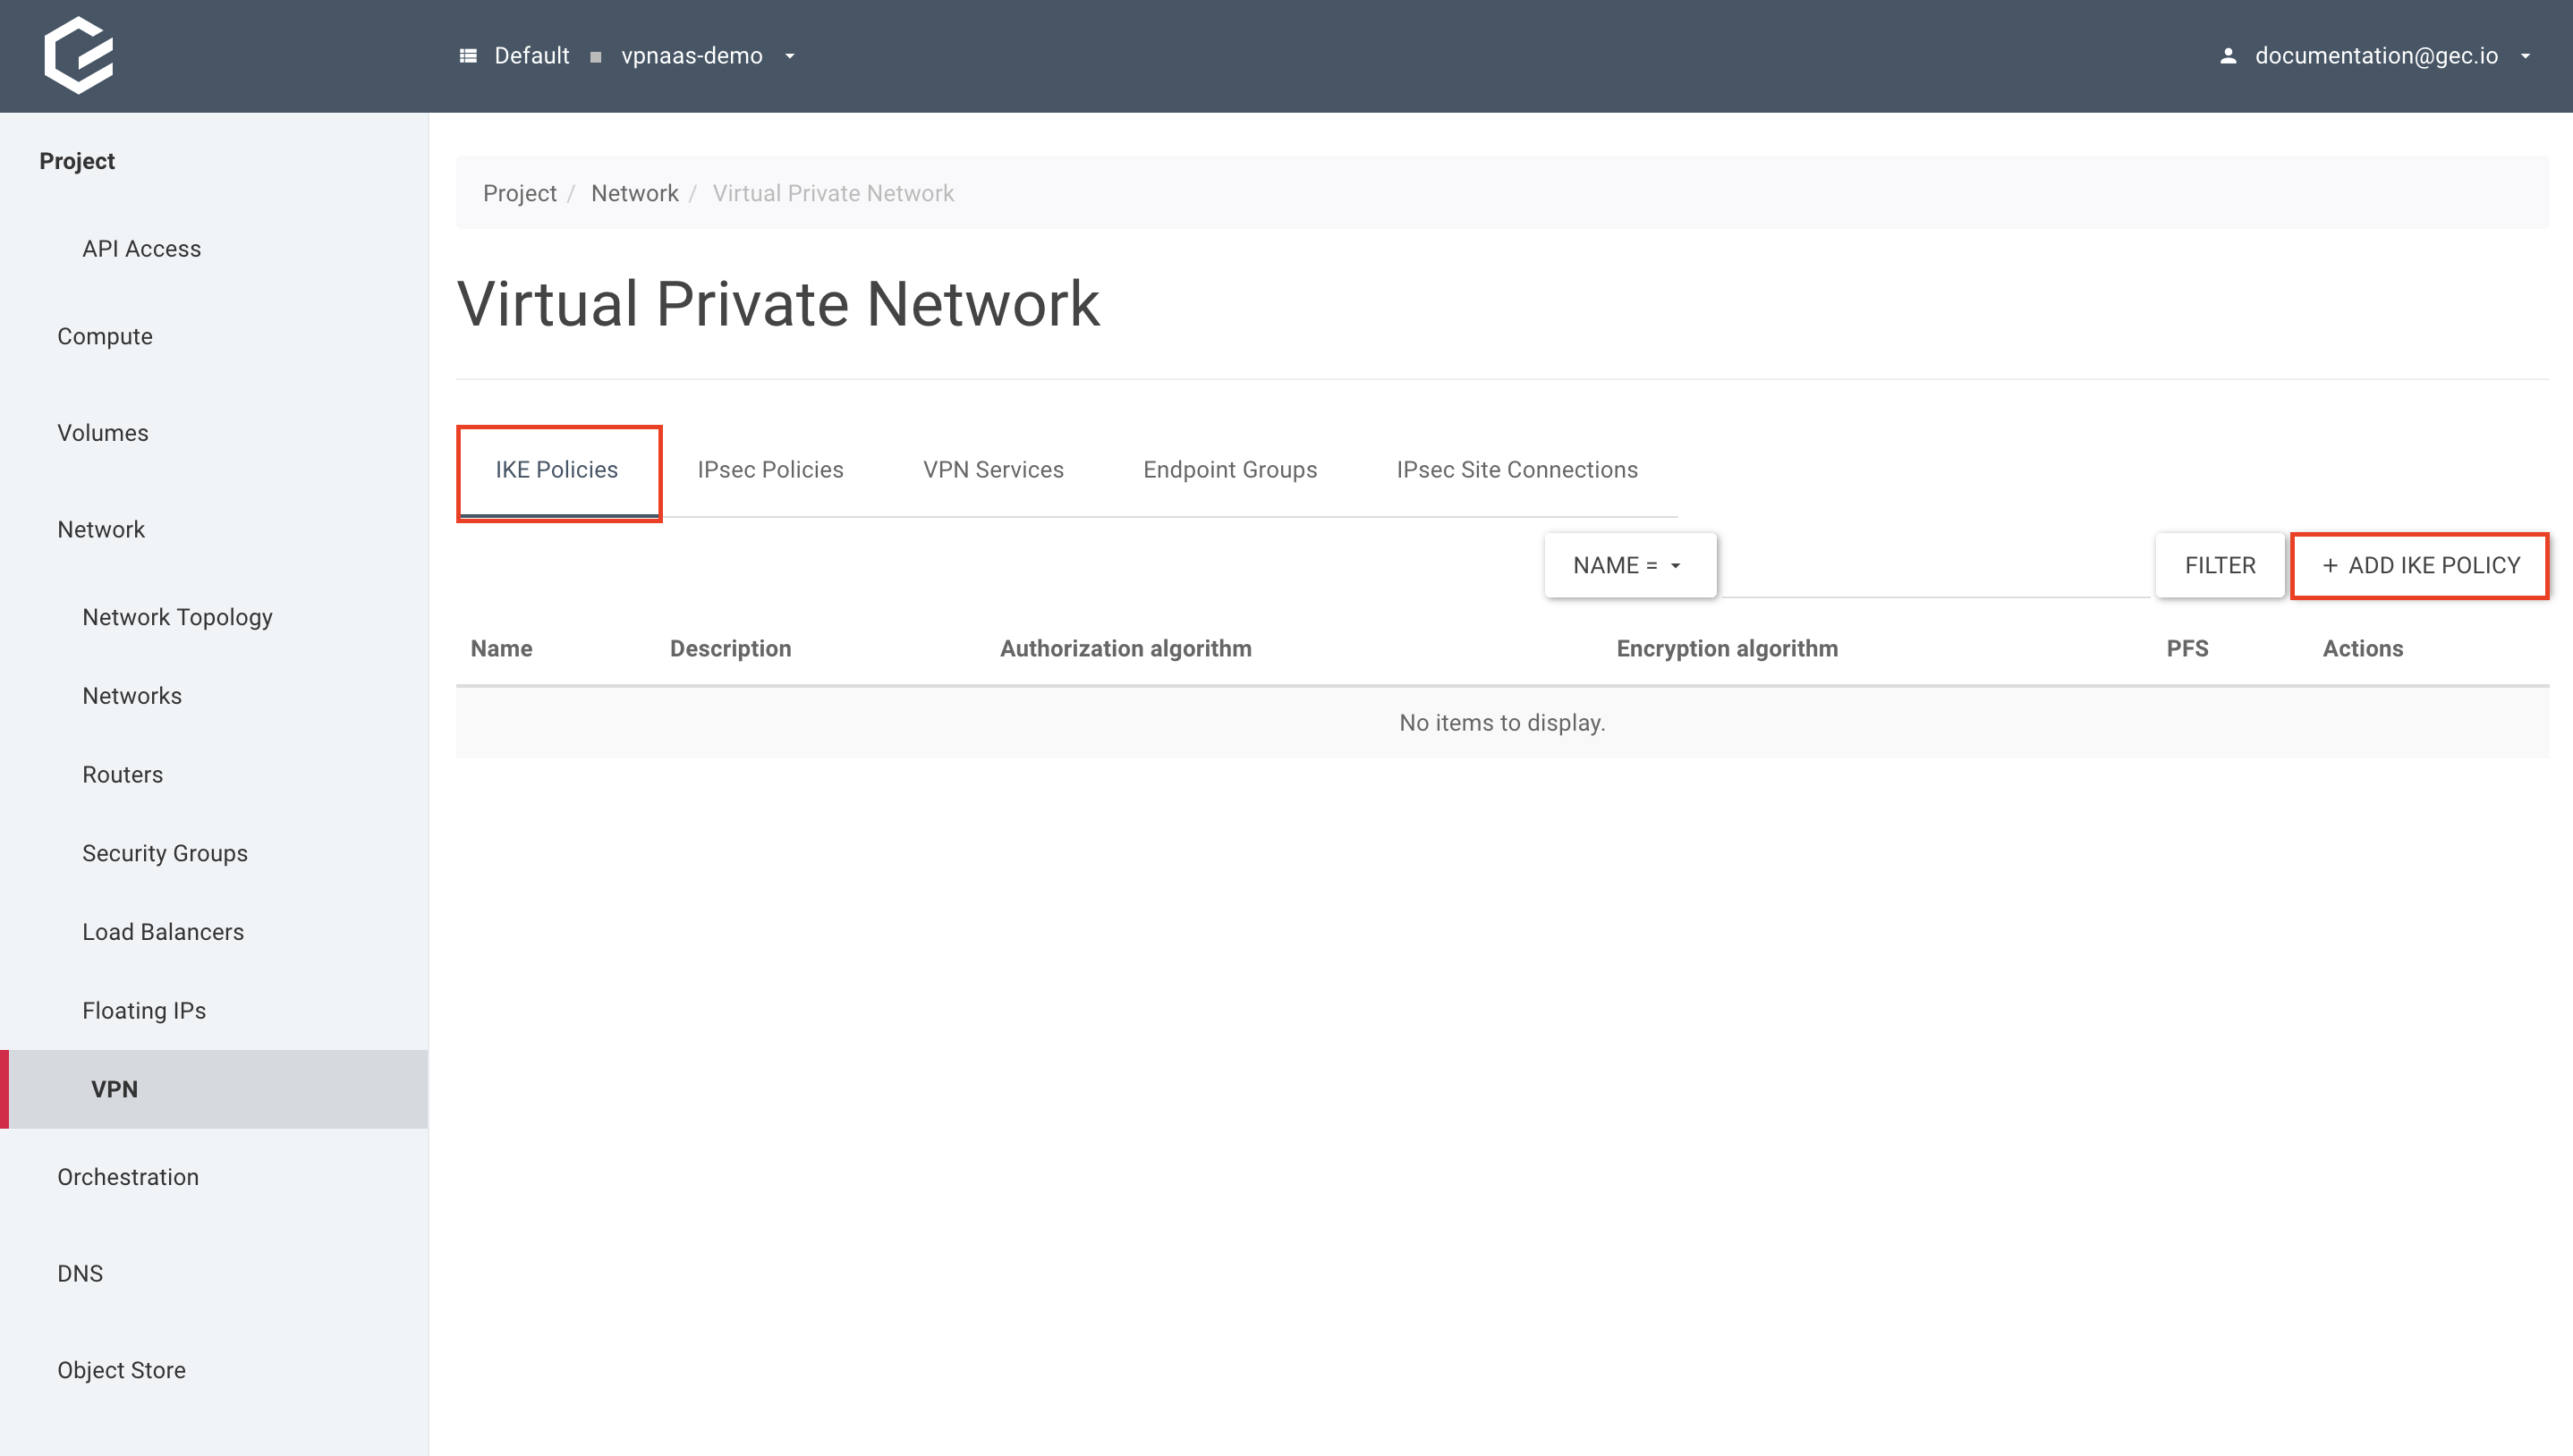
Give your IKE policy a name, and fill in the IKE policy parameters. Click Add.
- Create the IPSec policy.
Still within Network → VPN, select IPSec Policies and click Add IPsec Policy.
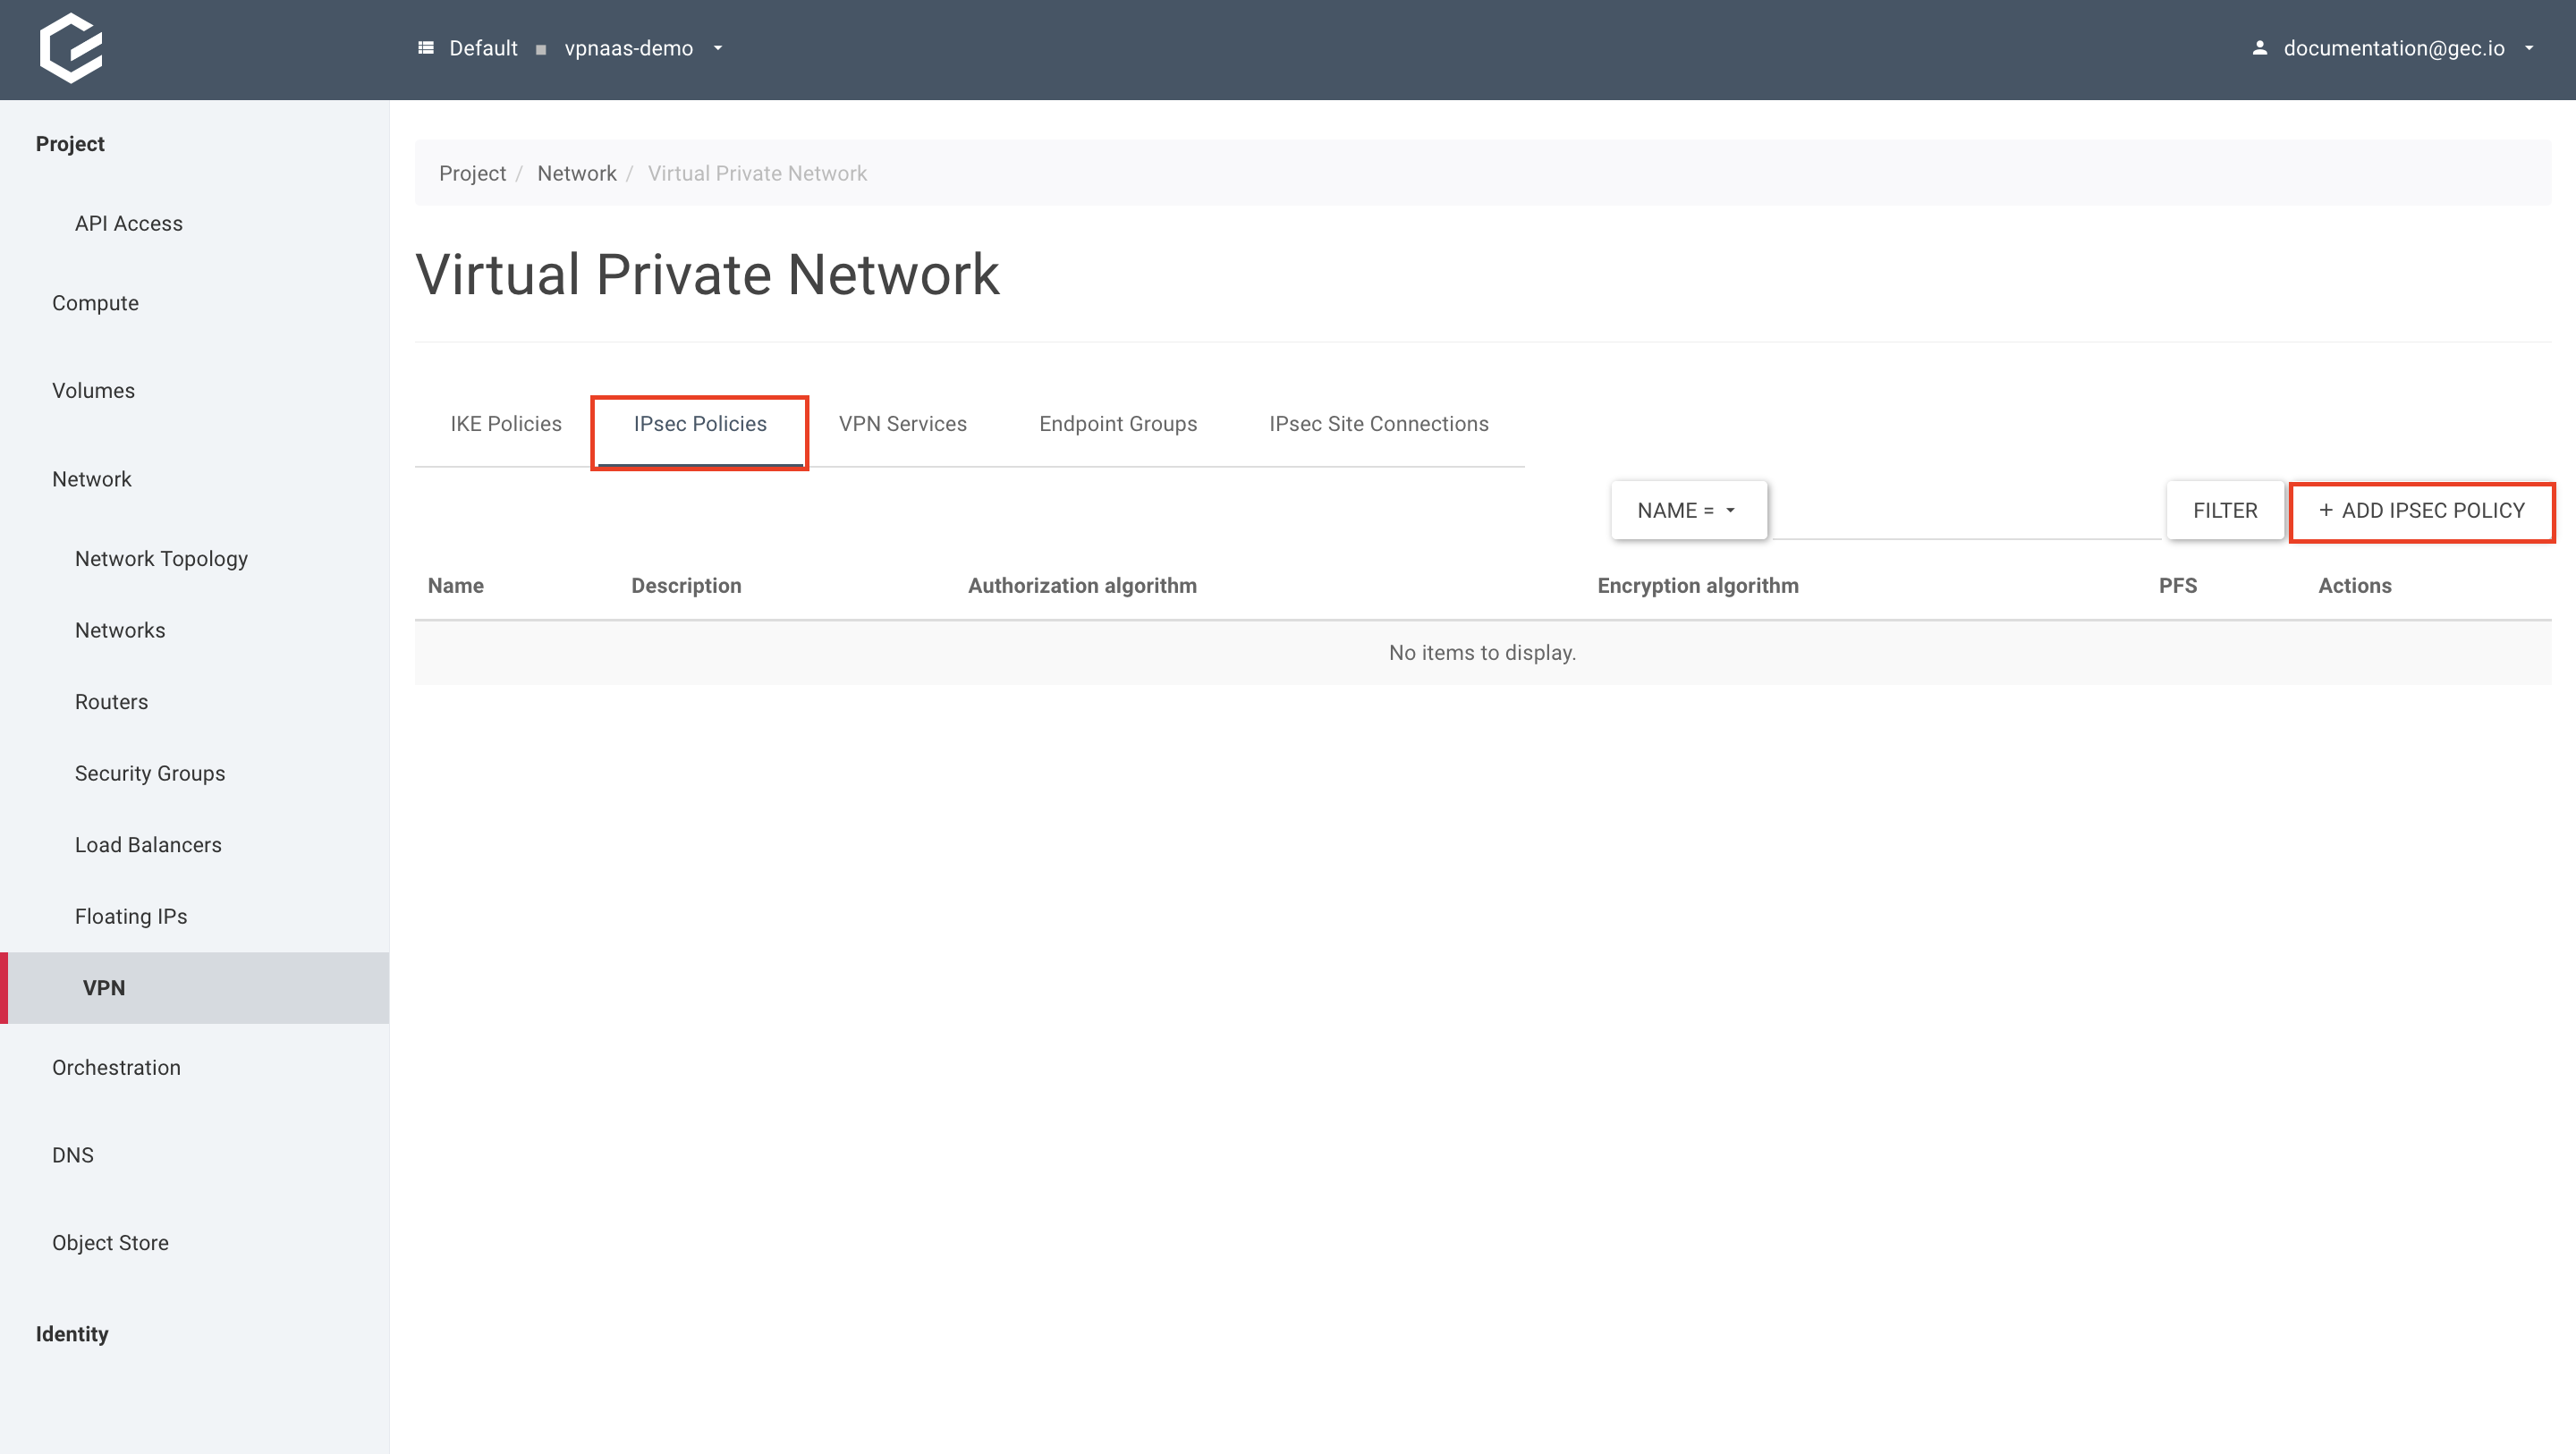
Give your IPSec policy a name, and fill in the IPSec policy parameters. Click Add.
Using the CLI
- Create the IKE policy using the
openstack vpn ike policy createcommand.
$ openstack vpn ike policy create \
  vpnaas-left-ike-policy \
  --auth-algorithm sha256 \
  --encryption-algorithm aes-256 \
  --ike-version v2 \
  --pfs group14
+-------------------------------+--------------------------------------+
| Field                         | Value                                |
+-------------------------------+--------------------------------------+
| Authentication Algorithm      | sha256                               |
| Description                   |                                      |
| Encryption Algorithm          | aes-256                              |
| ID                            | 561387b8-b5c1-415e-abc9-79ba93dd48ff |
| IKE Version                   | v2                                   |
| Lifetime                      | {'units': 'seconds', 'value': 3600}  |
| Name                          | vpnaas-left-ike-policy               |
| Perfect Forward Secrecy (PFS) | group14                              |
| Phase1 Negotiation Mode       | main                                 |
| Project                       | 281fa14f782e4d4cbfd4e34a121c2680     |
| project_id                    | 281fa14f782e4d4cbfd4e34a121c2680     |
+-------------------------------+--------------------------------------+
- Create the IPSec policy using the
openstack vpn ipsec policy createcommand.
$ openstack vpn ipsec policy create \
  vpnaas-left-ipsec-policy \
  --auth-algorithm sha256 \
  --encryption-algorithm aes-256 \
  --pfs group14 \
  --transform-protocol esp
+-------------------------------+--------------------------------------+
| Field                         | Value                                |
+-------------------------------+--------------------------------------+
| Authentication Algorithm      | sha256                               |
| Description                   |                                      |
| Encapsulation Mode            | tunnel                               |
| Encryption Algorithm          | aes-256                              |
| ID                            | 553a600e-f39d-47a0-9550-97f2b4033685 |
| Lifetime                      | {'units': 'seconds', 'value': 3600}  |
| Name                          | vpnaas-left-ipsec-policy             |
| Perfect Forward Secrecy (PFS) | group14                              |
| Project                       | 281fa14f782e4d4cbfd4e34a121c2680     |
| Transform Protocol            | esp                                  |
| project_id                    | 281fa14f782e4d4cbfd4e34a121c2680     |
+-------------------------------+--------------------------------------+
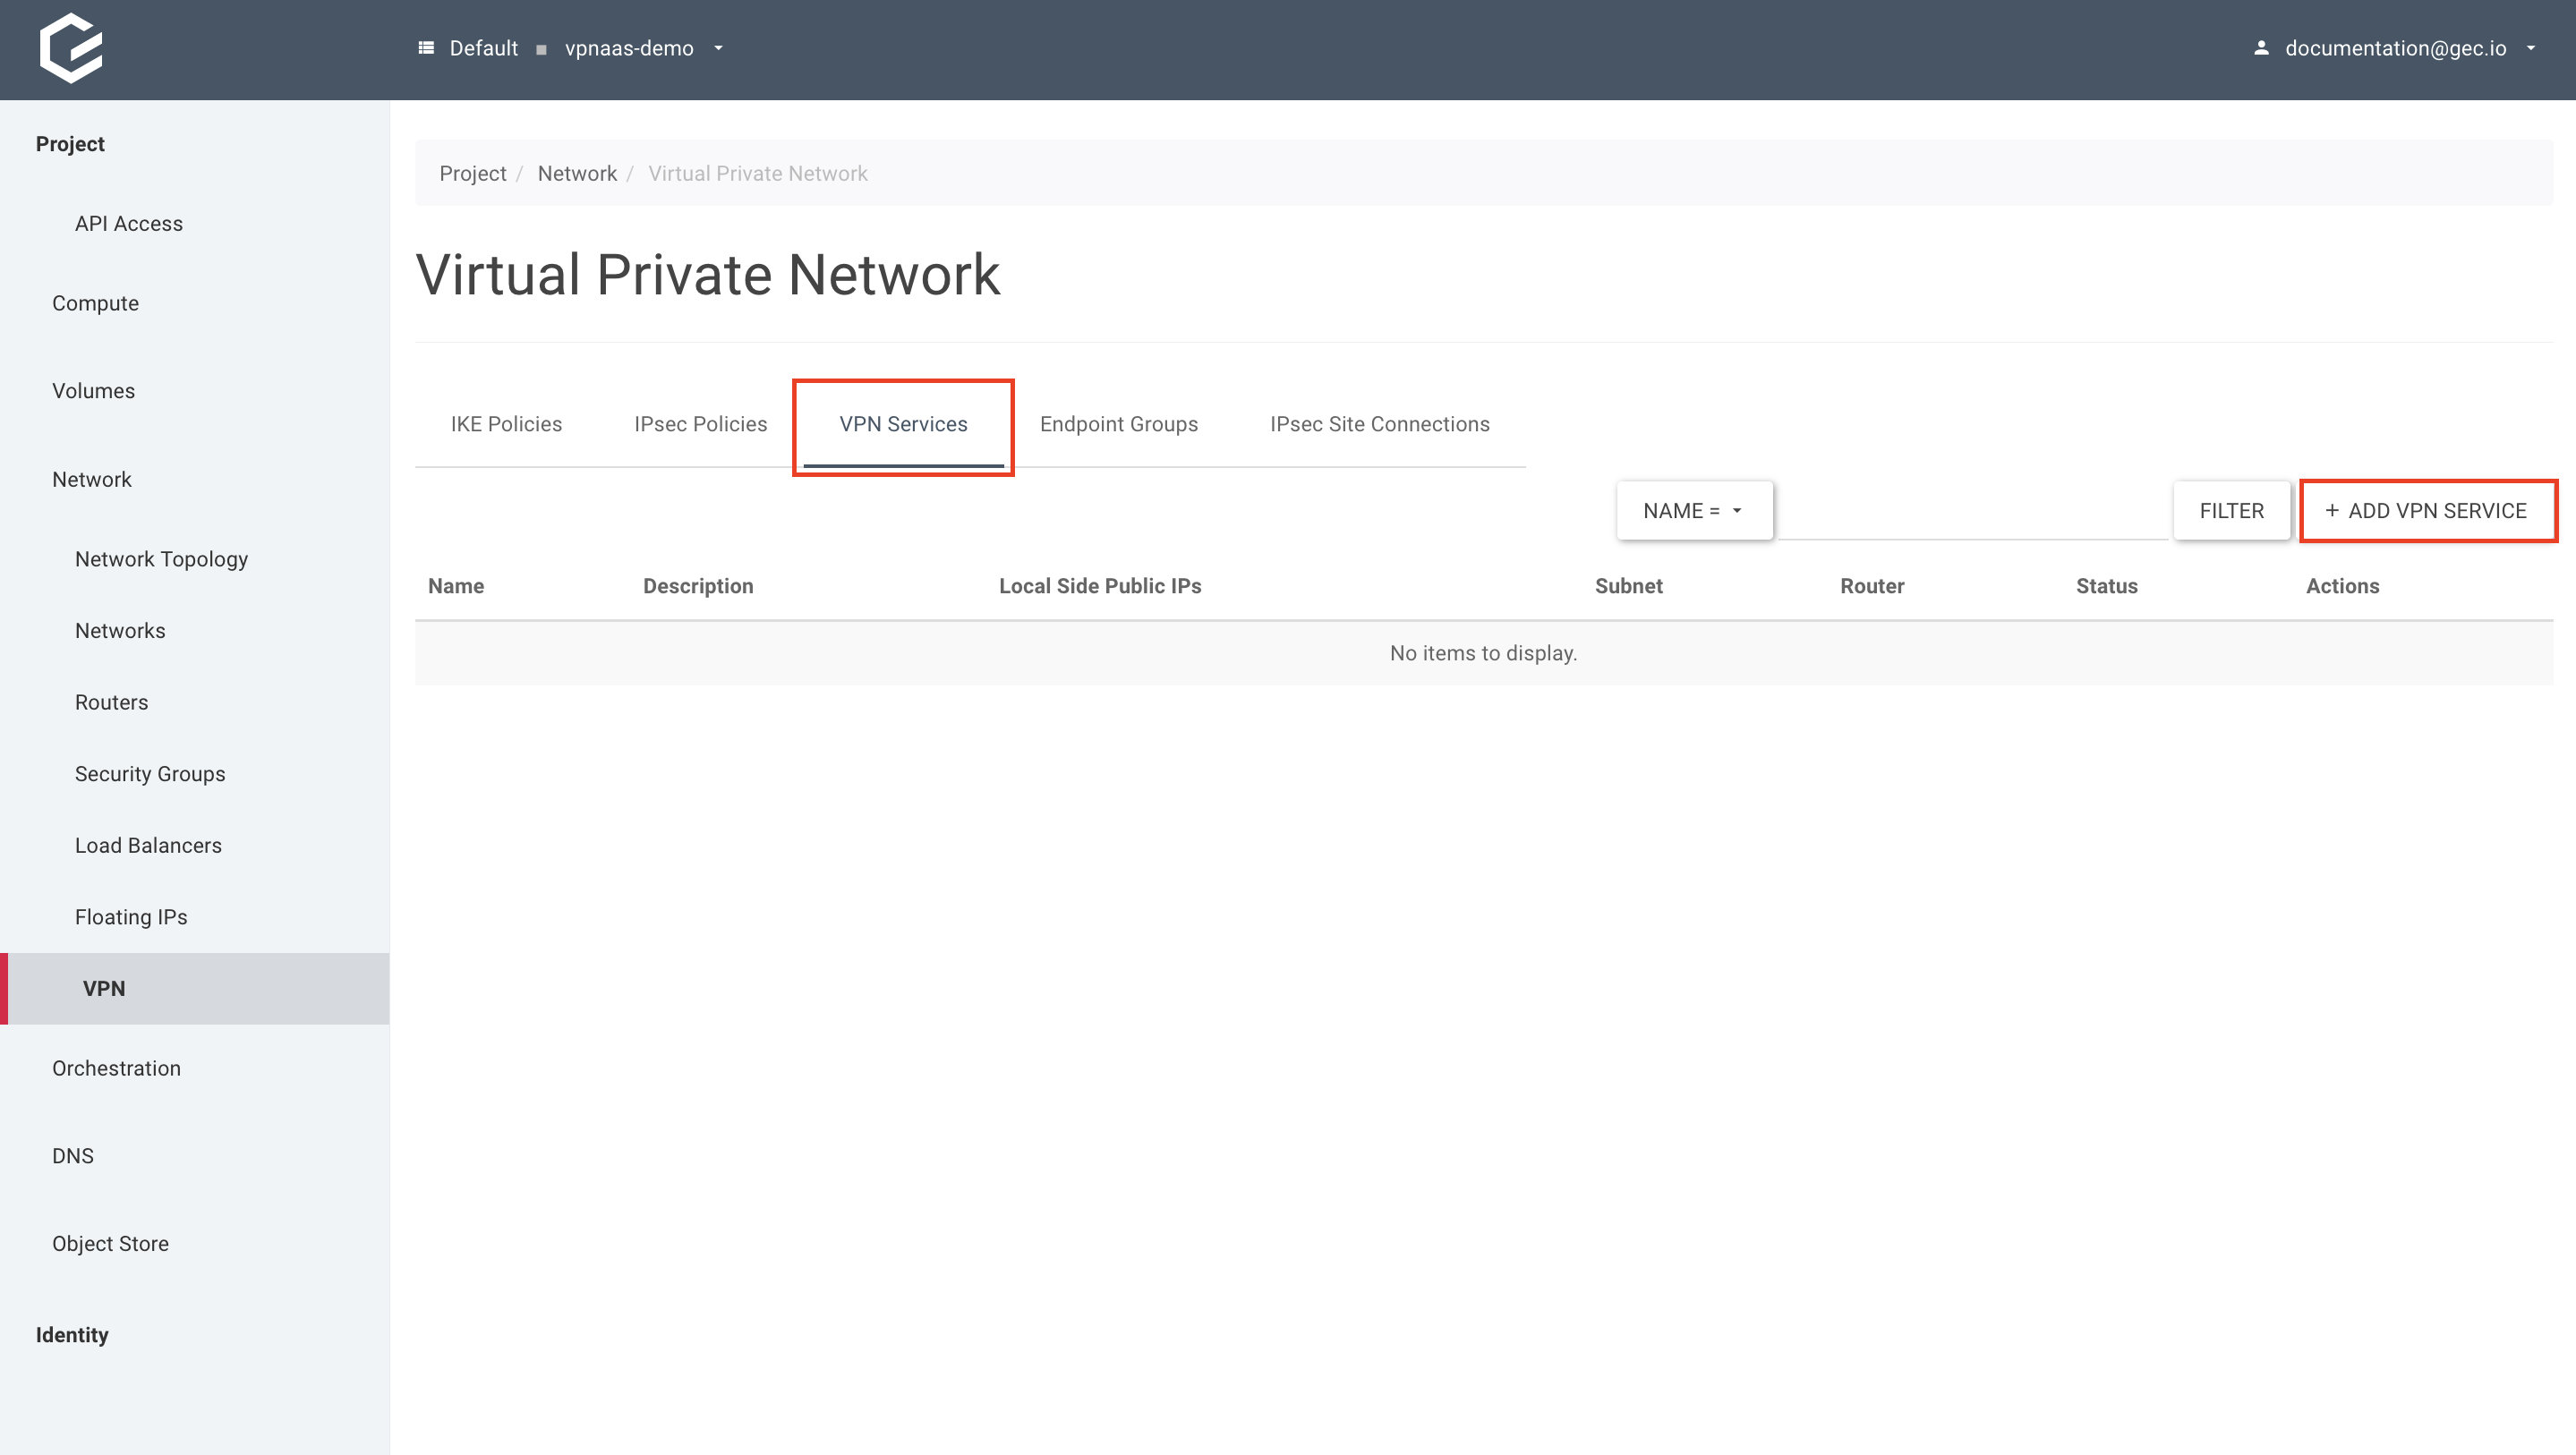
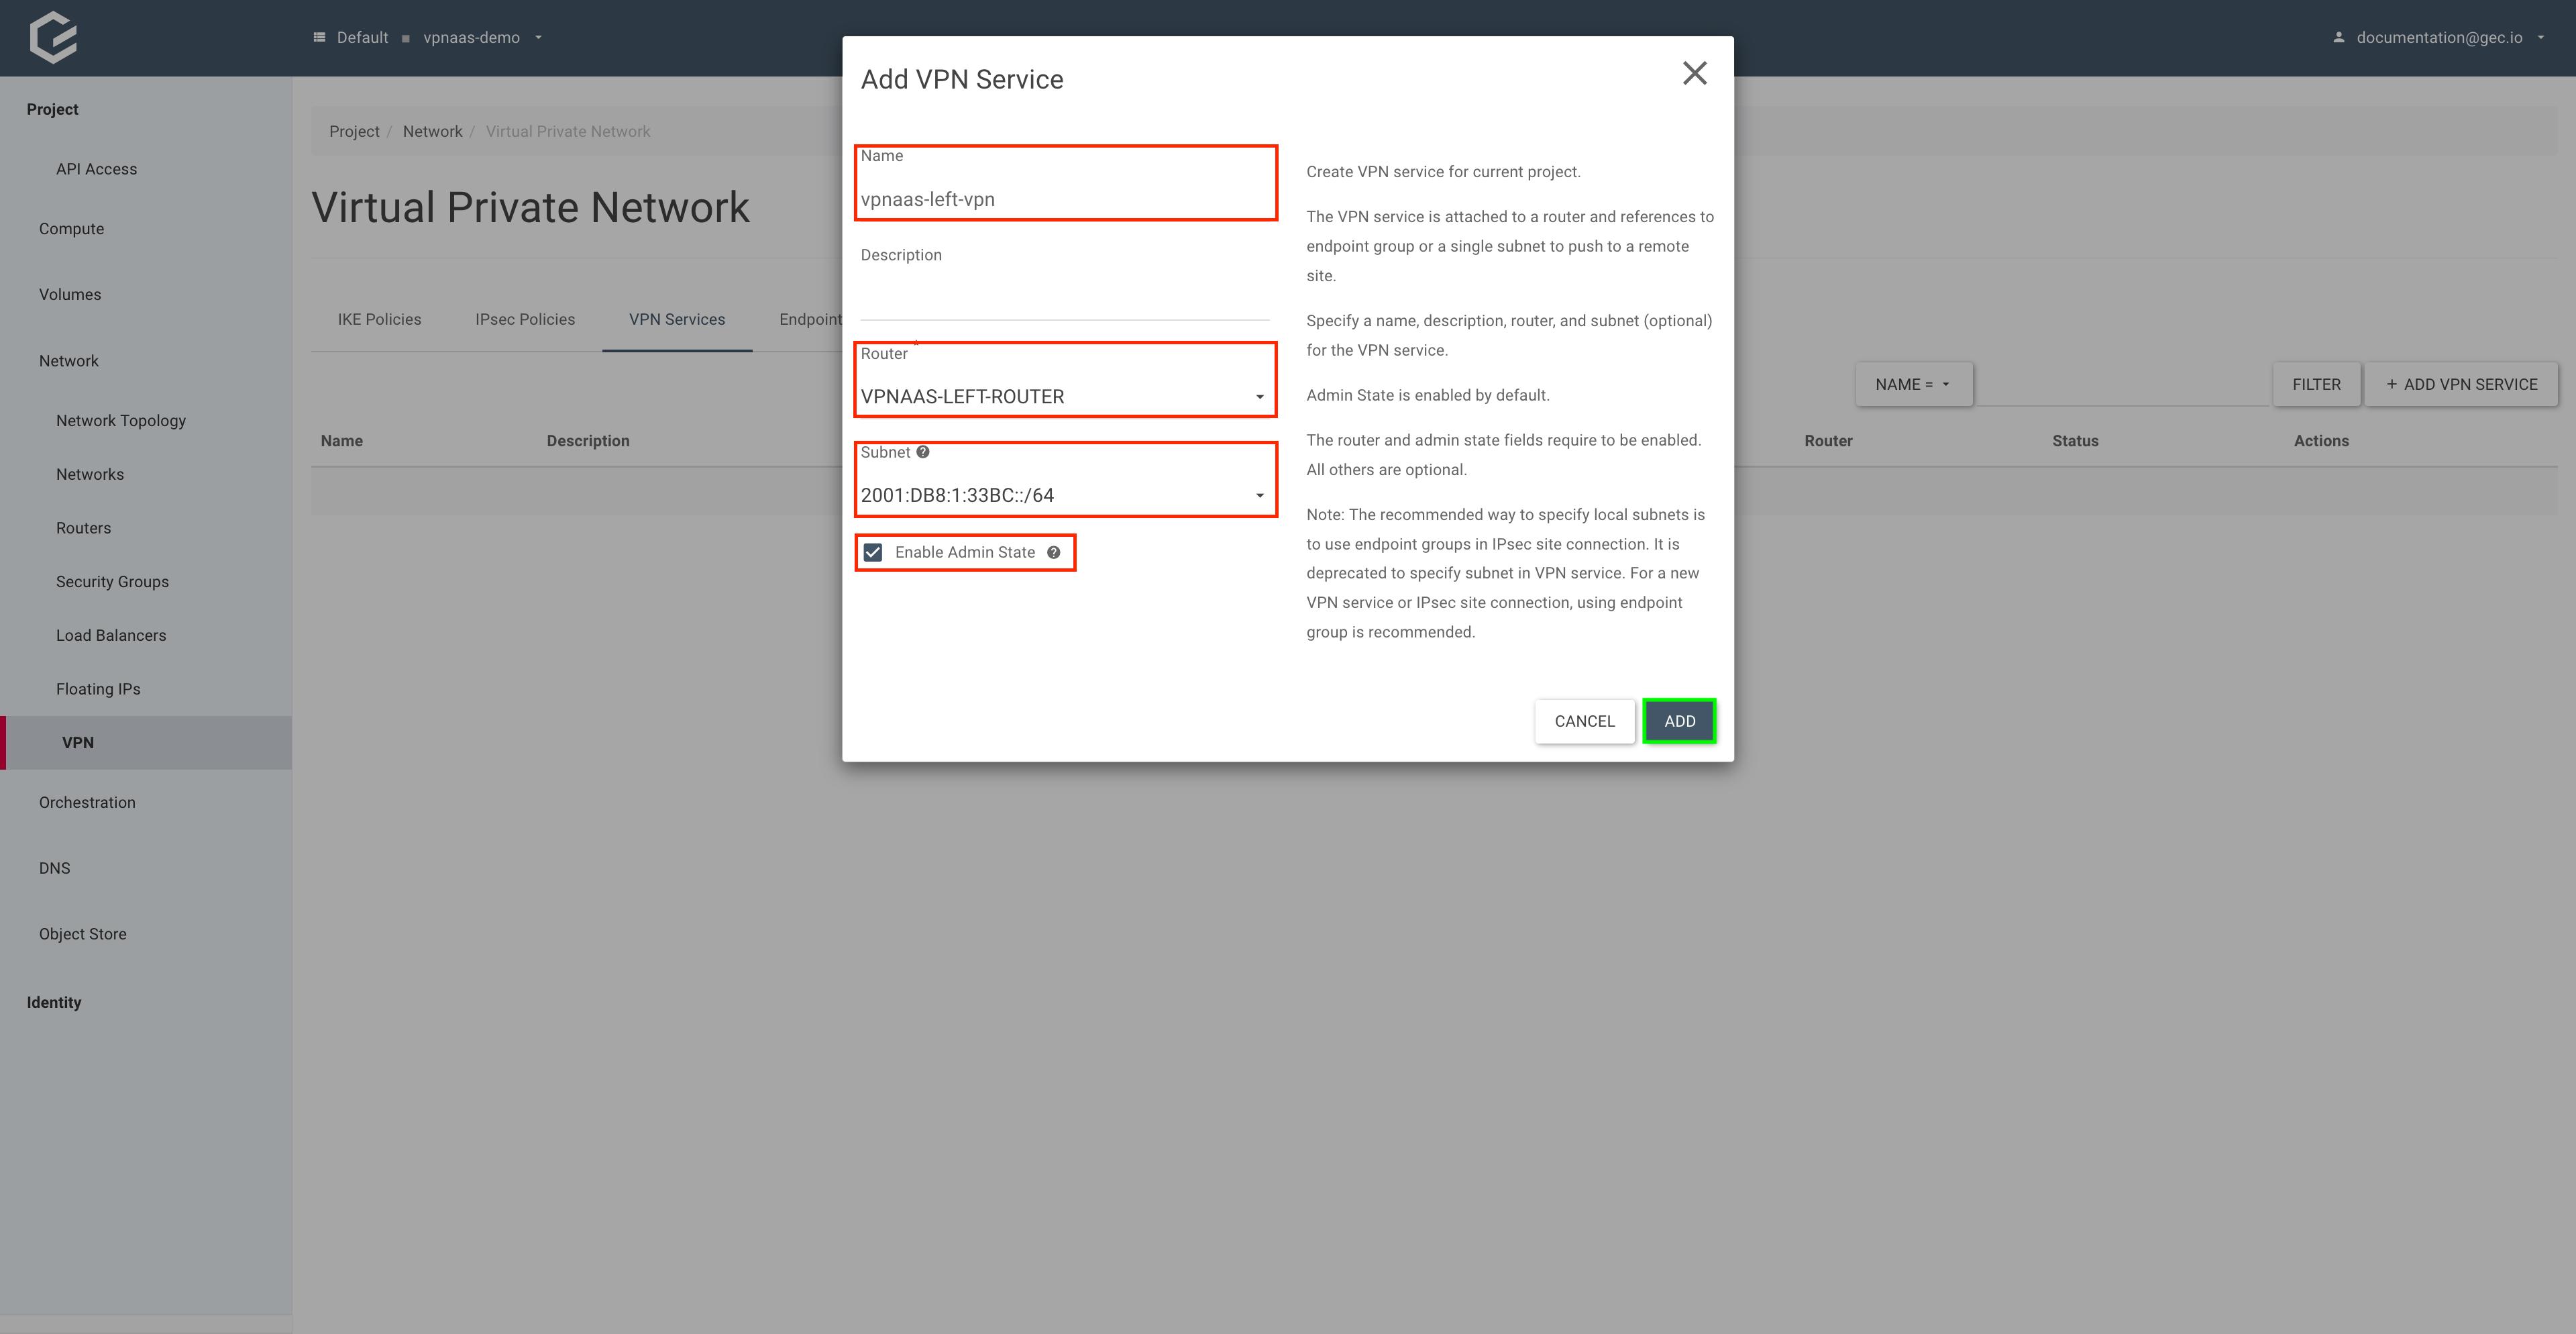
Create the VPN service on both sides
Using Horizon (GUI)
Within your project, navigate to Network → VPN, select VPN Services and click Add VPN Service.
Give your VPN service a name, select your router and Enable Admin State. A subnet is not needed as we will be using endpoint groups. Click Add.
Using the CLI
Use the openstack vpn service create command to create the VPN service.
$ openstack vpn service create vpnaas-left-vpn --router vpnaas-left-router
+----------------+--------------------------------------+
| Field          | Value                                |
+----------------+--------------------------------------+
| Description    |                                      |
| Flavor         | None                                 |
| ID             | cc258fd7-0e87-4058-ad7d-355f32c1ab5e |
| Name           | vpnaas-left-vpn                      |
| Project        | 281fa14f782e4d4cbfd4e34a121c2680     |
| Router         | 052e968a-a63b-4824-b904-eb70c42c53e5 |
| State          | True                                 |
| Status         | PENDING_CREATE                       |
| Subnet         | None                                 |
| external_v4_ip | 185.116.244.85                       |
| external_v6_ip | 2a00:c320:1003::23a                  |
| project_id     | 281fa14f782e4d4cbfd4e34a121c2680     |
+----------------+--------------------------------------+
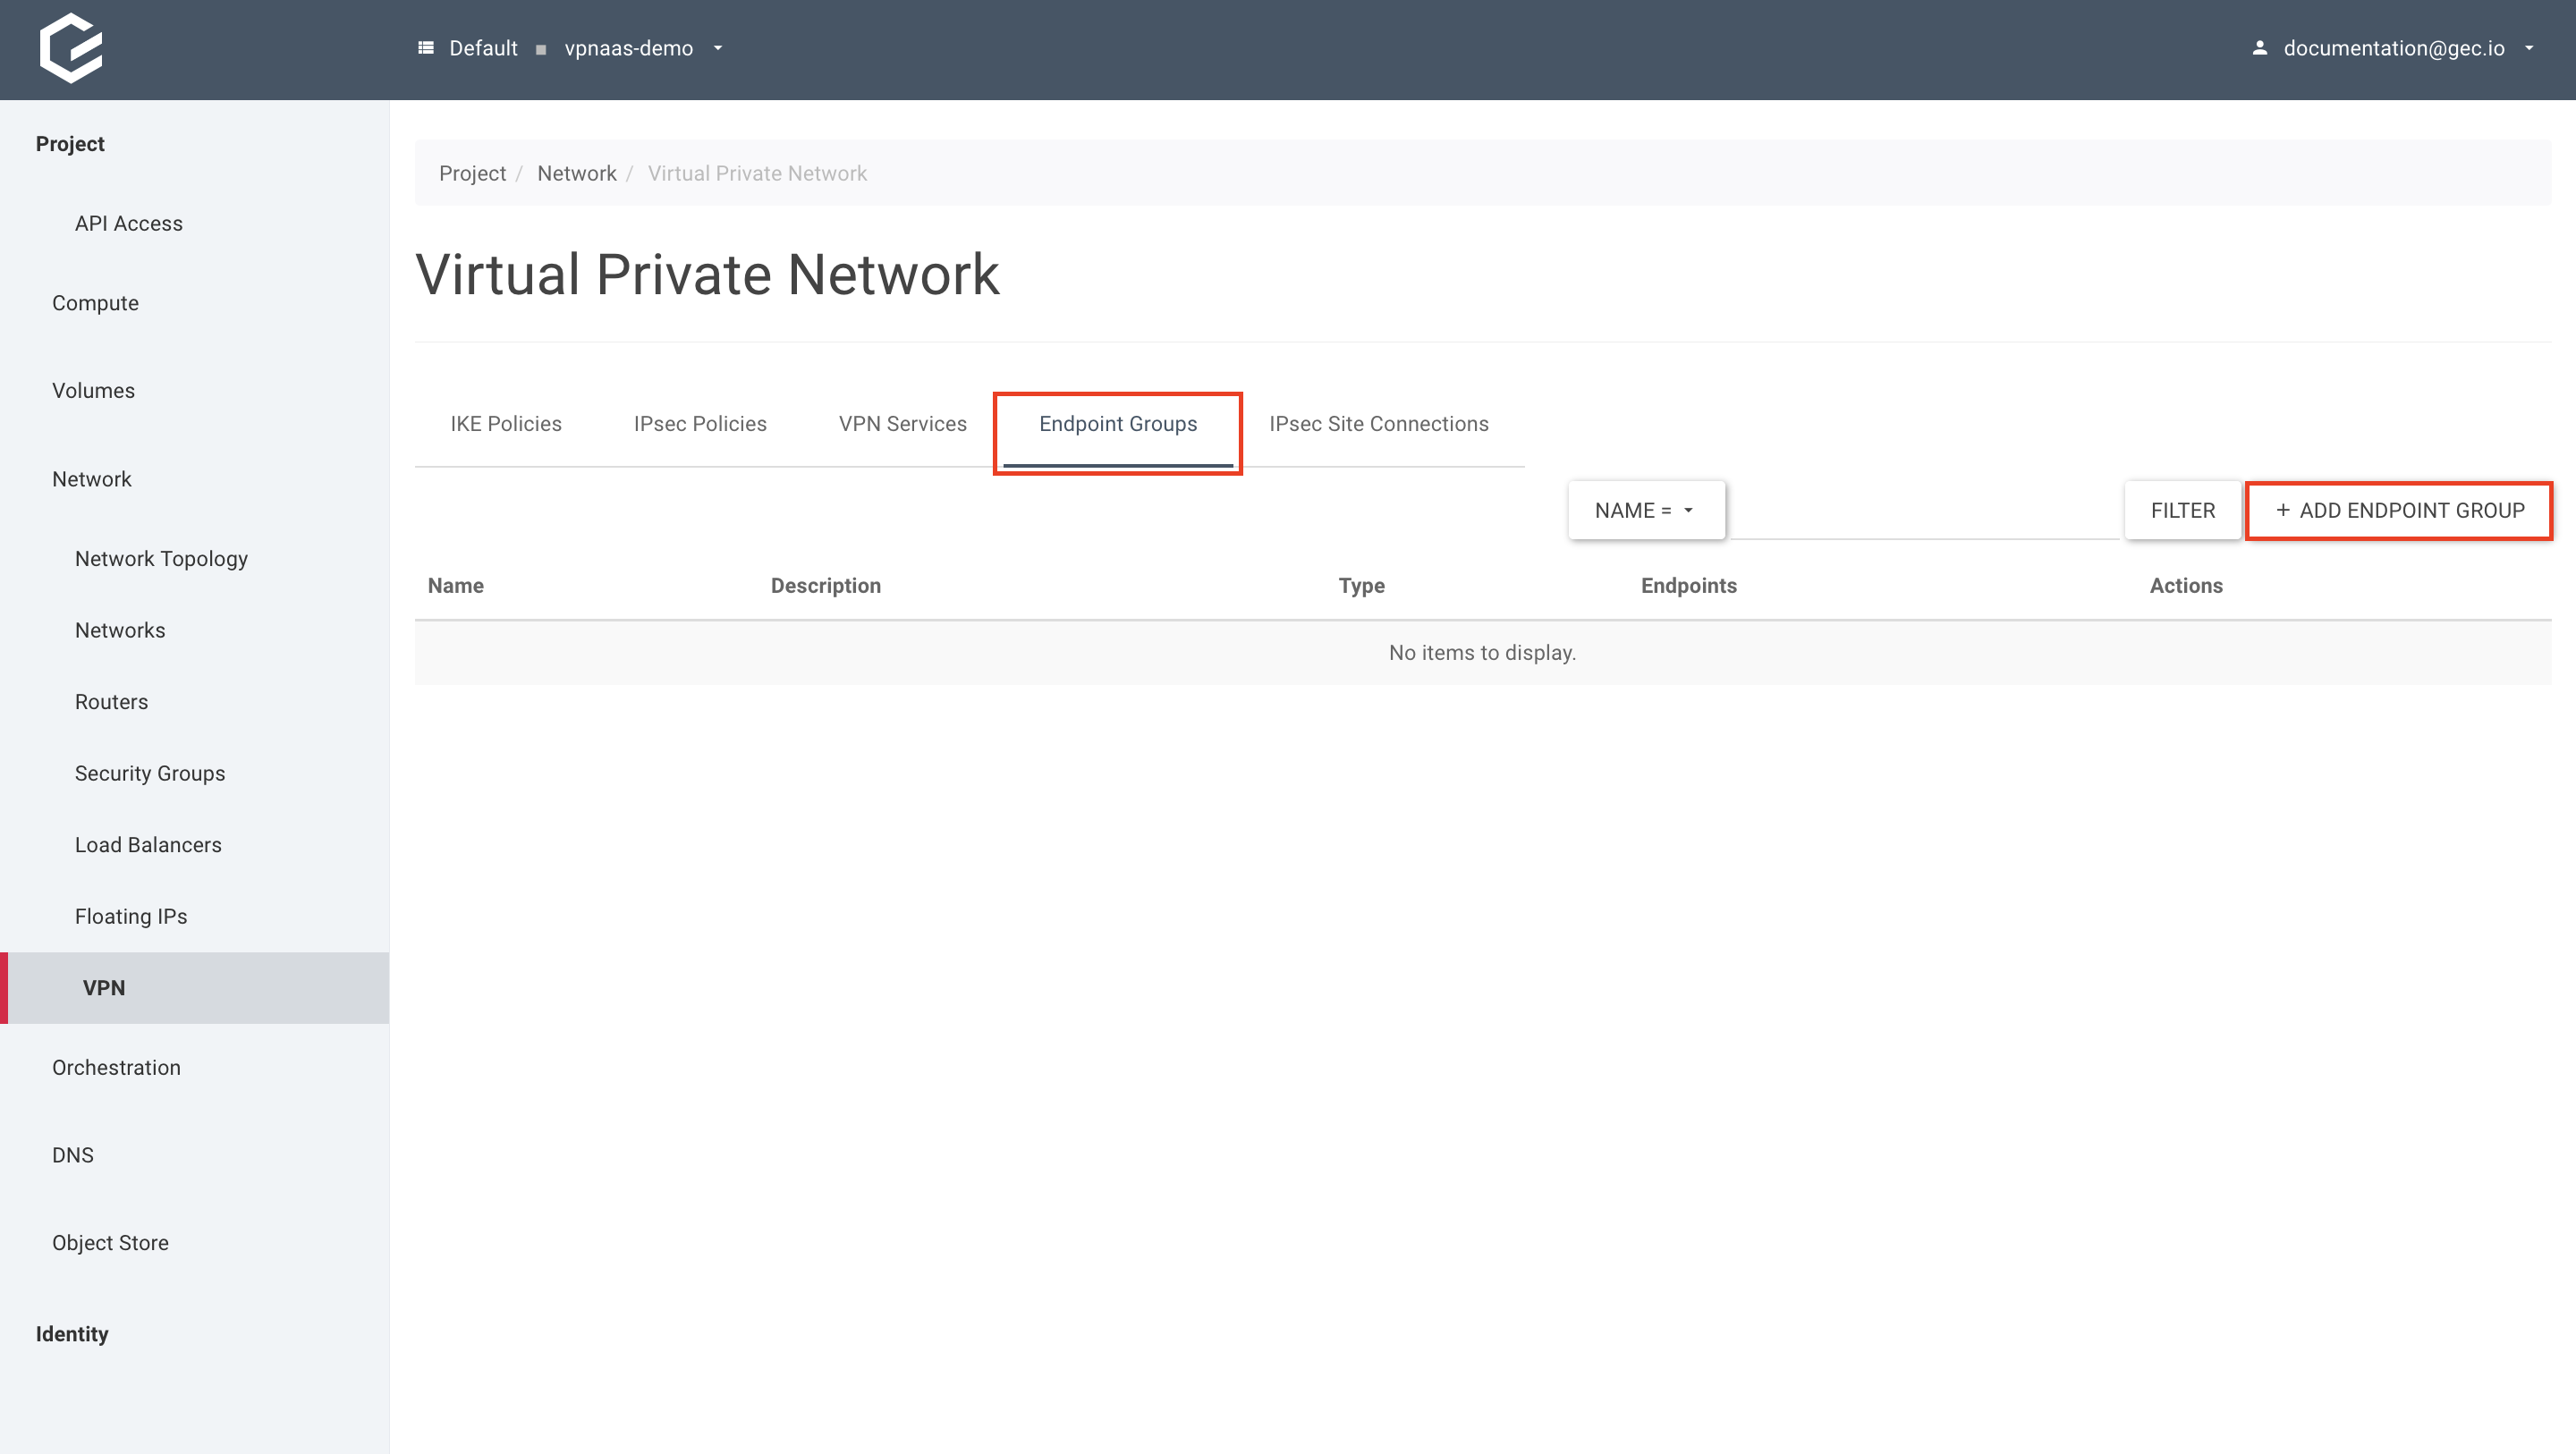
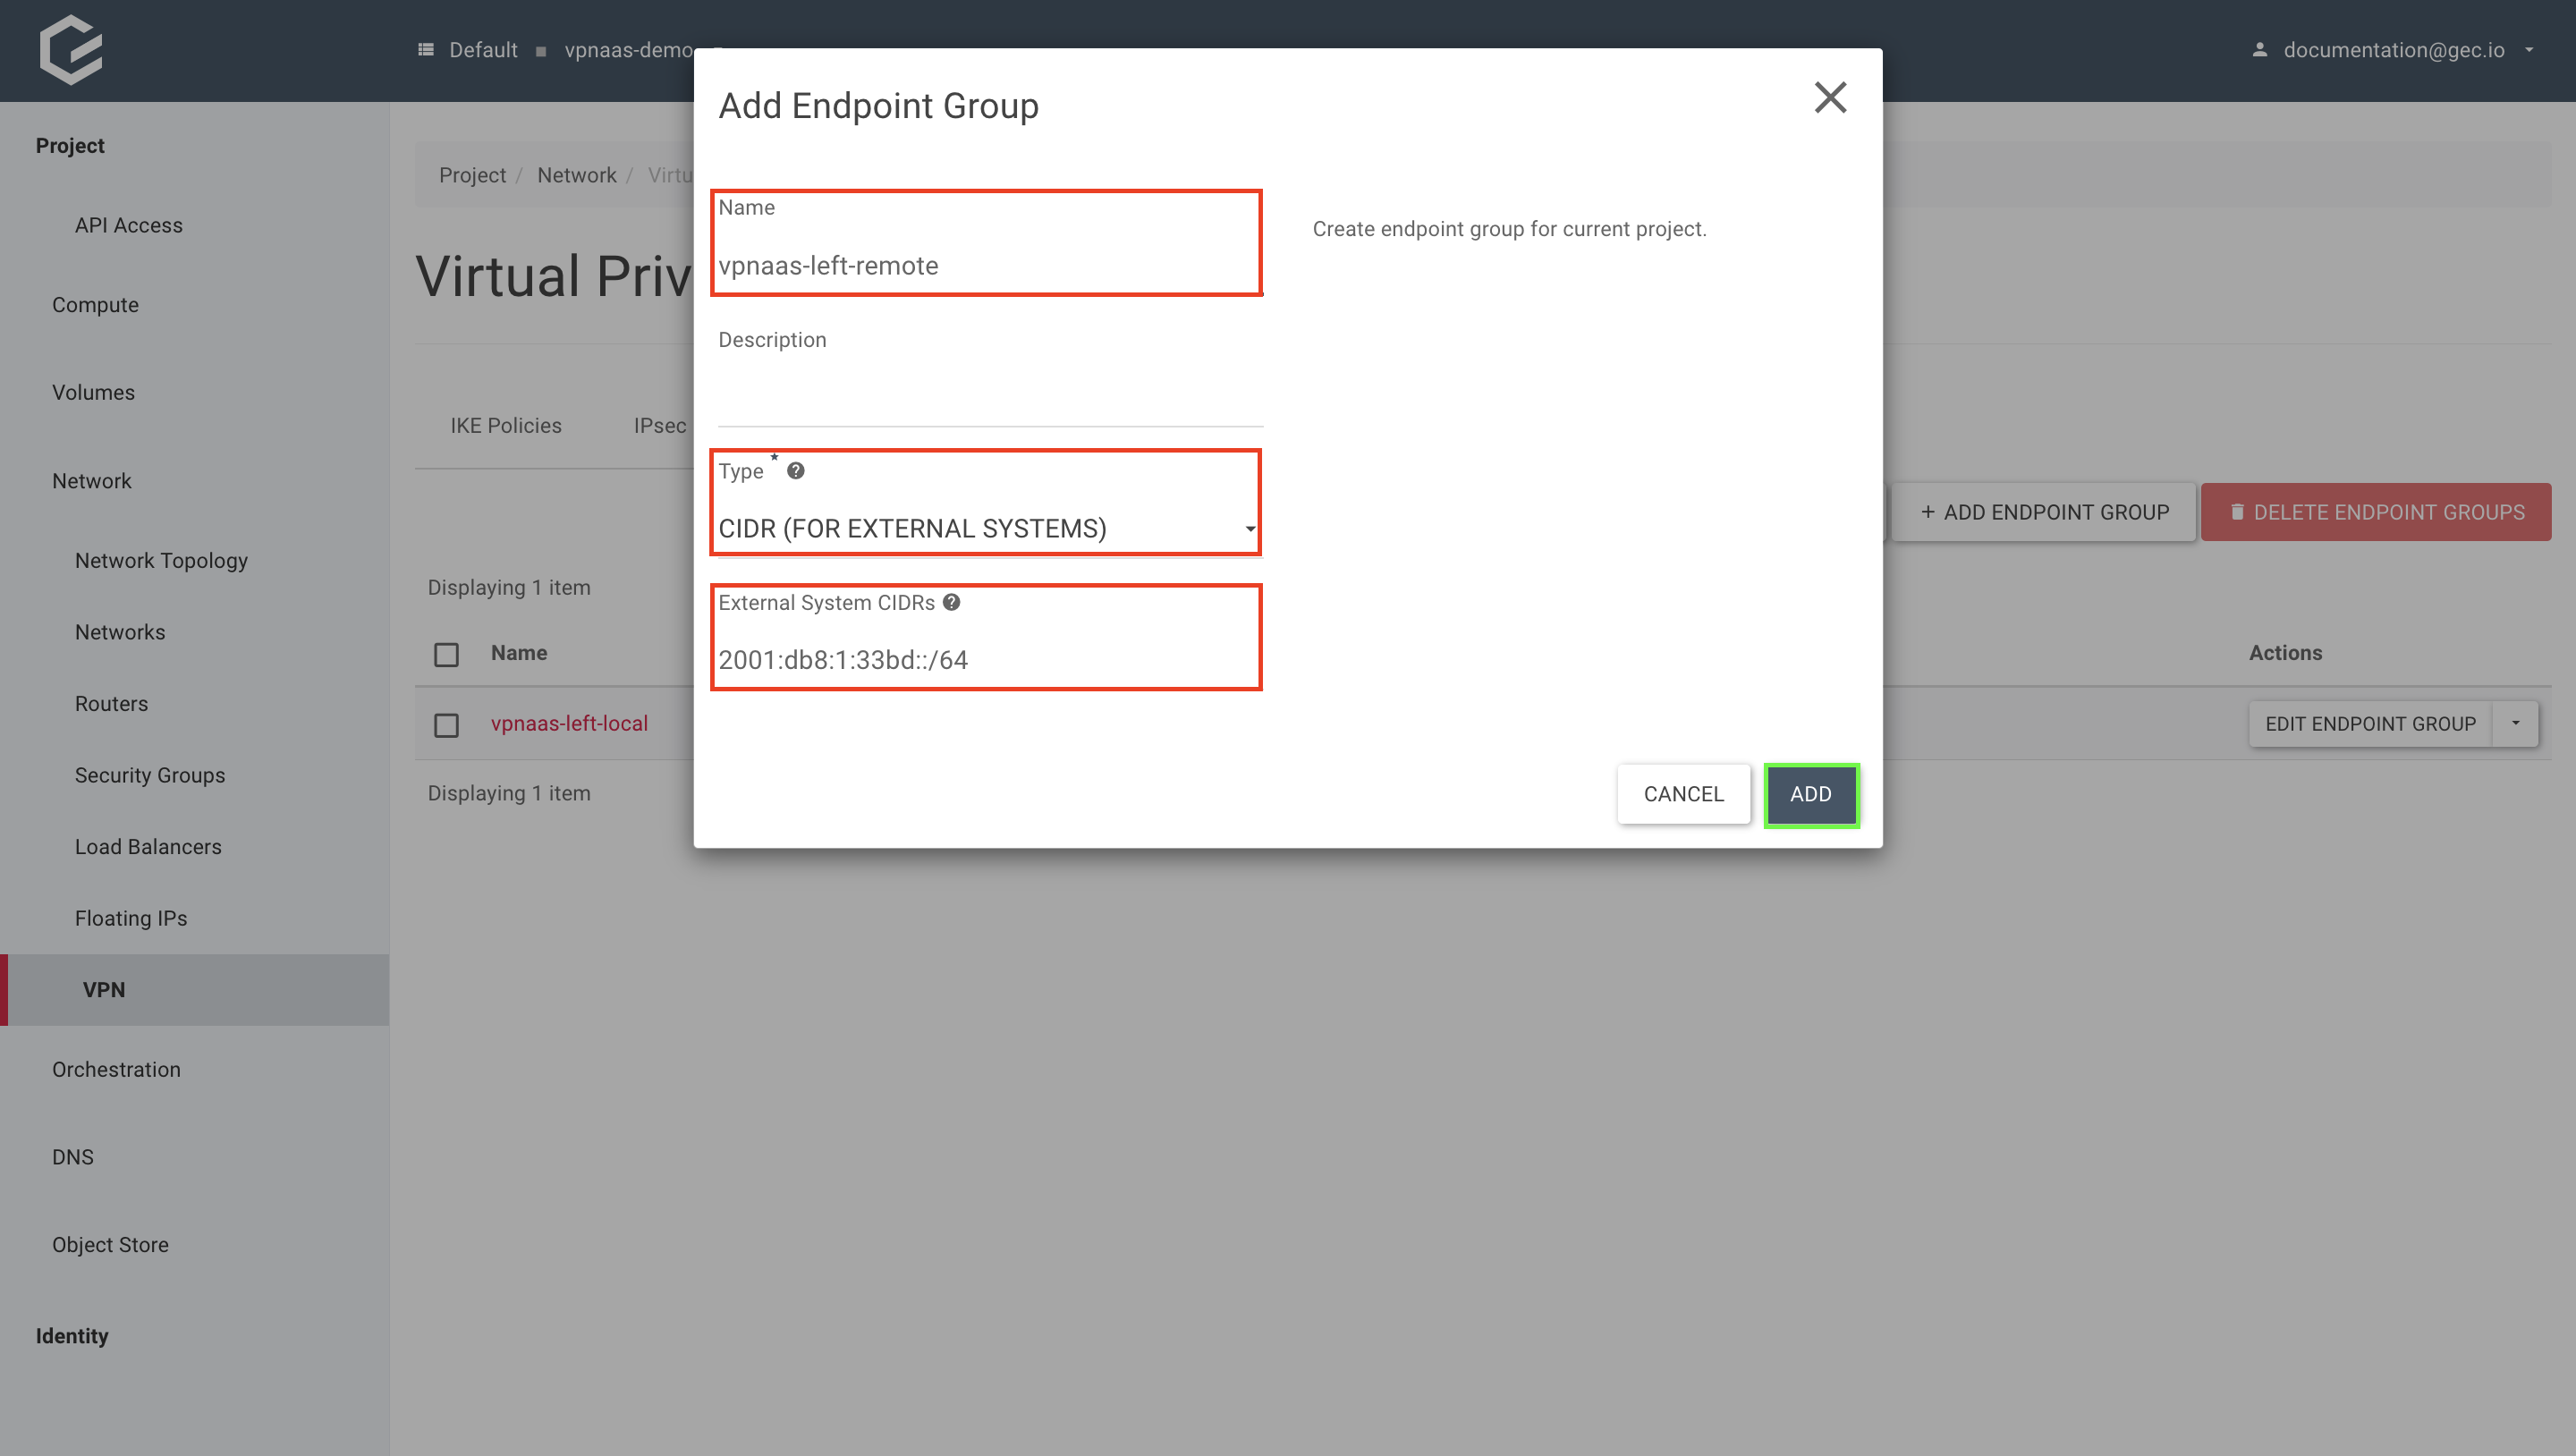
Create the endpoint groups
When using multiple subnets, make sure your VPN endpoint supports routing multiple subnets through the same connection. While OpenStack does, for implementations that do not support this, multiple endpoint groups need to be created, one for each subnet.
Using Horizon (GUI)
- Create the local endpoint group for the left side.
Within your project, navigate to Network → VPN, select Endpoint Groups and click Add Endpoint Group.
Give your endpoint group a name, select the Type “Subnet” and select your subnet under Local System Subnets. Click Add.

- Create the peer endpoint group for the left side.
Still within Network → VPN, Endpoint Groups, click Add Endpoint Group again.
Give your endpoint group a name, select the Type “CIDR” and enter the subnet of the right side. Click Add.
Using the CLI
- Use the
openstack vpn endpoint group createcommand to create the local endpoint group for the left side.
$ openstack vpn endpoint group create \
  vpnaas-left-local \
  --type subnet \
  --value vpnaas-left-network-subnet
+-------------+------------------------------------------+
| Field       | Value                                    |
+-------------+------------------------------------------+
| Description |                                          |
| Endpoints   | ['e217a377-48c7-4c18-93b5-cfd805bde40a'] |
| ID          | 949ccc53-5dc6-457d-95bf-278fdf9a3e5d     |
| Name        | vpnaas-left-local                        |
| Project     | 281fa14f782e4d4cbfd4e34a121c2680         |
| Type        | subnet                                   |
| project_id  | 281fa14f782e4d4cbfd4e34a121c2680         |
+-------------+------------------------------------------+
- Use the
openstack vpn endpoint group createcommand again to create the peer endpoint group for the left side.
$ openstack vpn endpoint group create \
  vpnaas-left-remote \
  --type cidr \
  --value  2001:db8:1:33bd::/64
+-------------+--------------------------------------+
| Field       | Value                                |
+-------------+--------------------------------------+
| Description |                                      |
| Endpoints   | ['2001:db8:1:33bd::/64']             |
| ID          | 9146346d-1306-4b03-a3ce-04ee51832ed8 |
| Name        | vpnaas-left-remote                   |
| Project     | 281fa14f782e4d4cbfd4e34a121c2680     |
| Type        | cidr                                 |
| project_id  | 281fa14f782e4d4cbfd4e34a121c2680     |
+-------------+--------------------------------------+
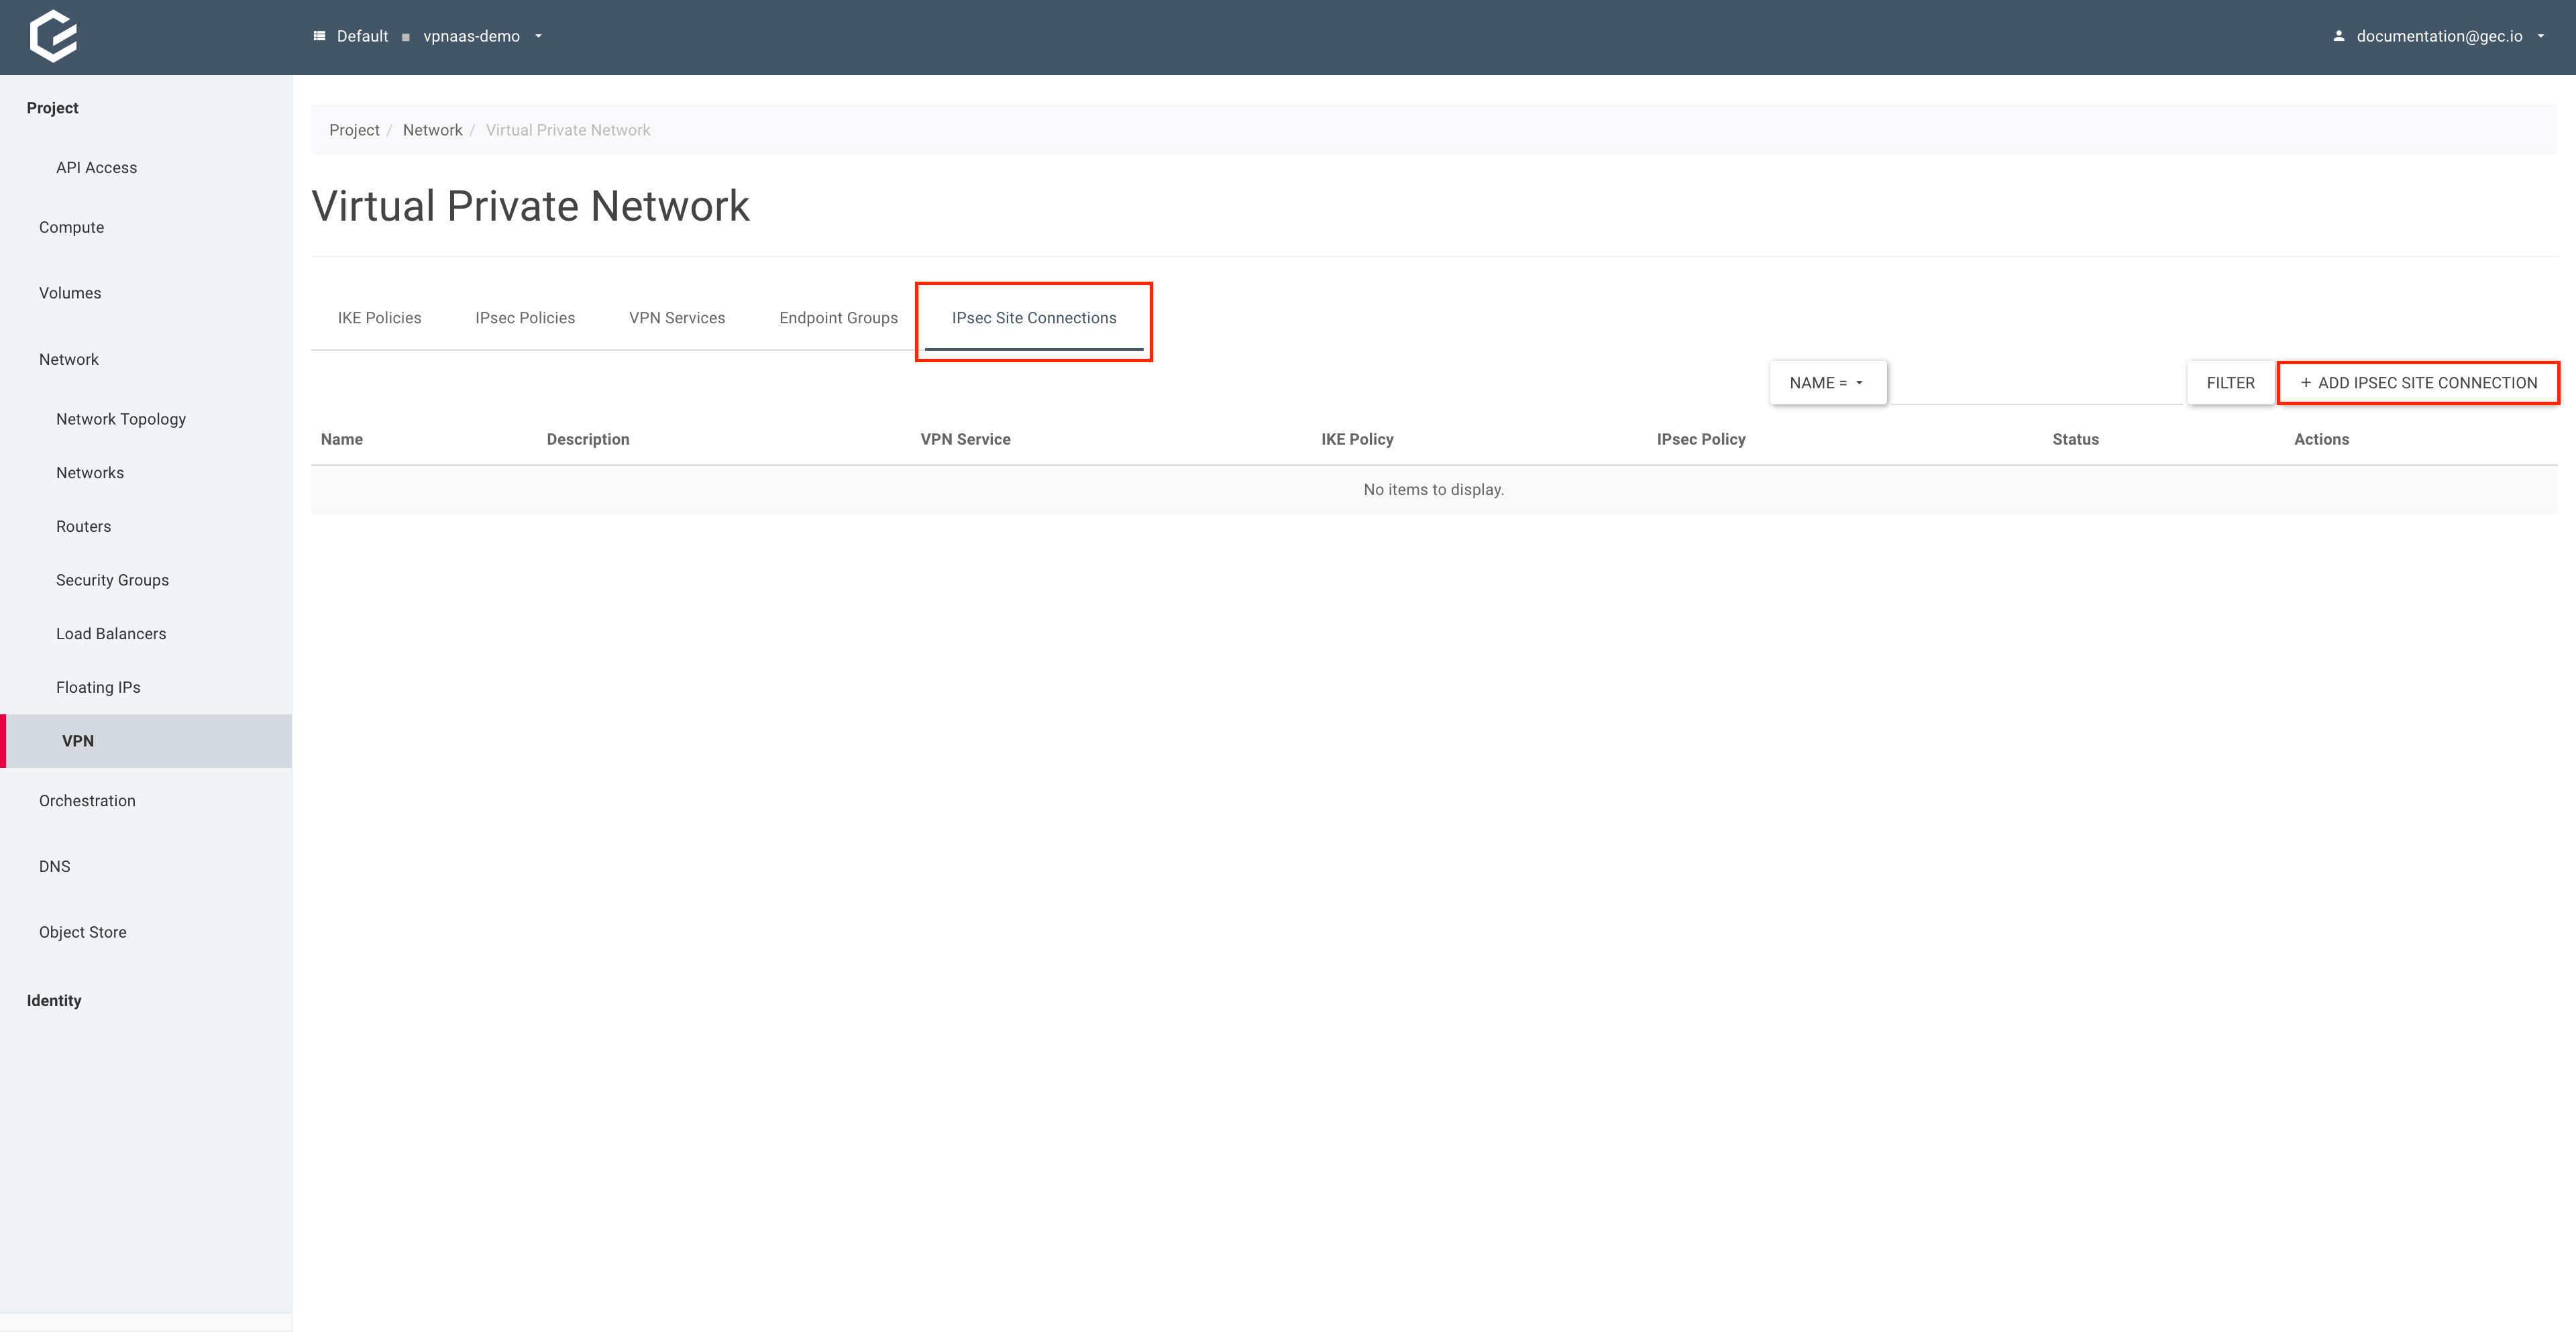
Create the site connections
Just like with the endpoint groups, if your VPN endpoint does not support routing multiple subnets through the same connection, you need to create multiple site connections, one for each subnet/endpoint group.
Using Horizon (GUI)
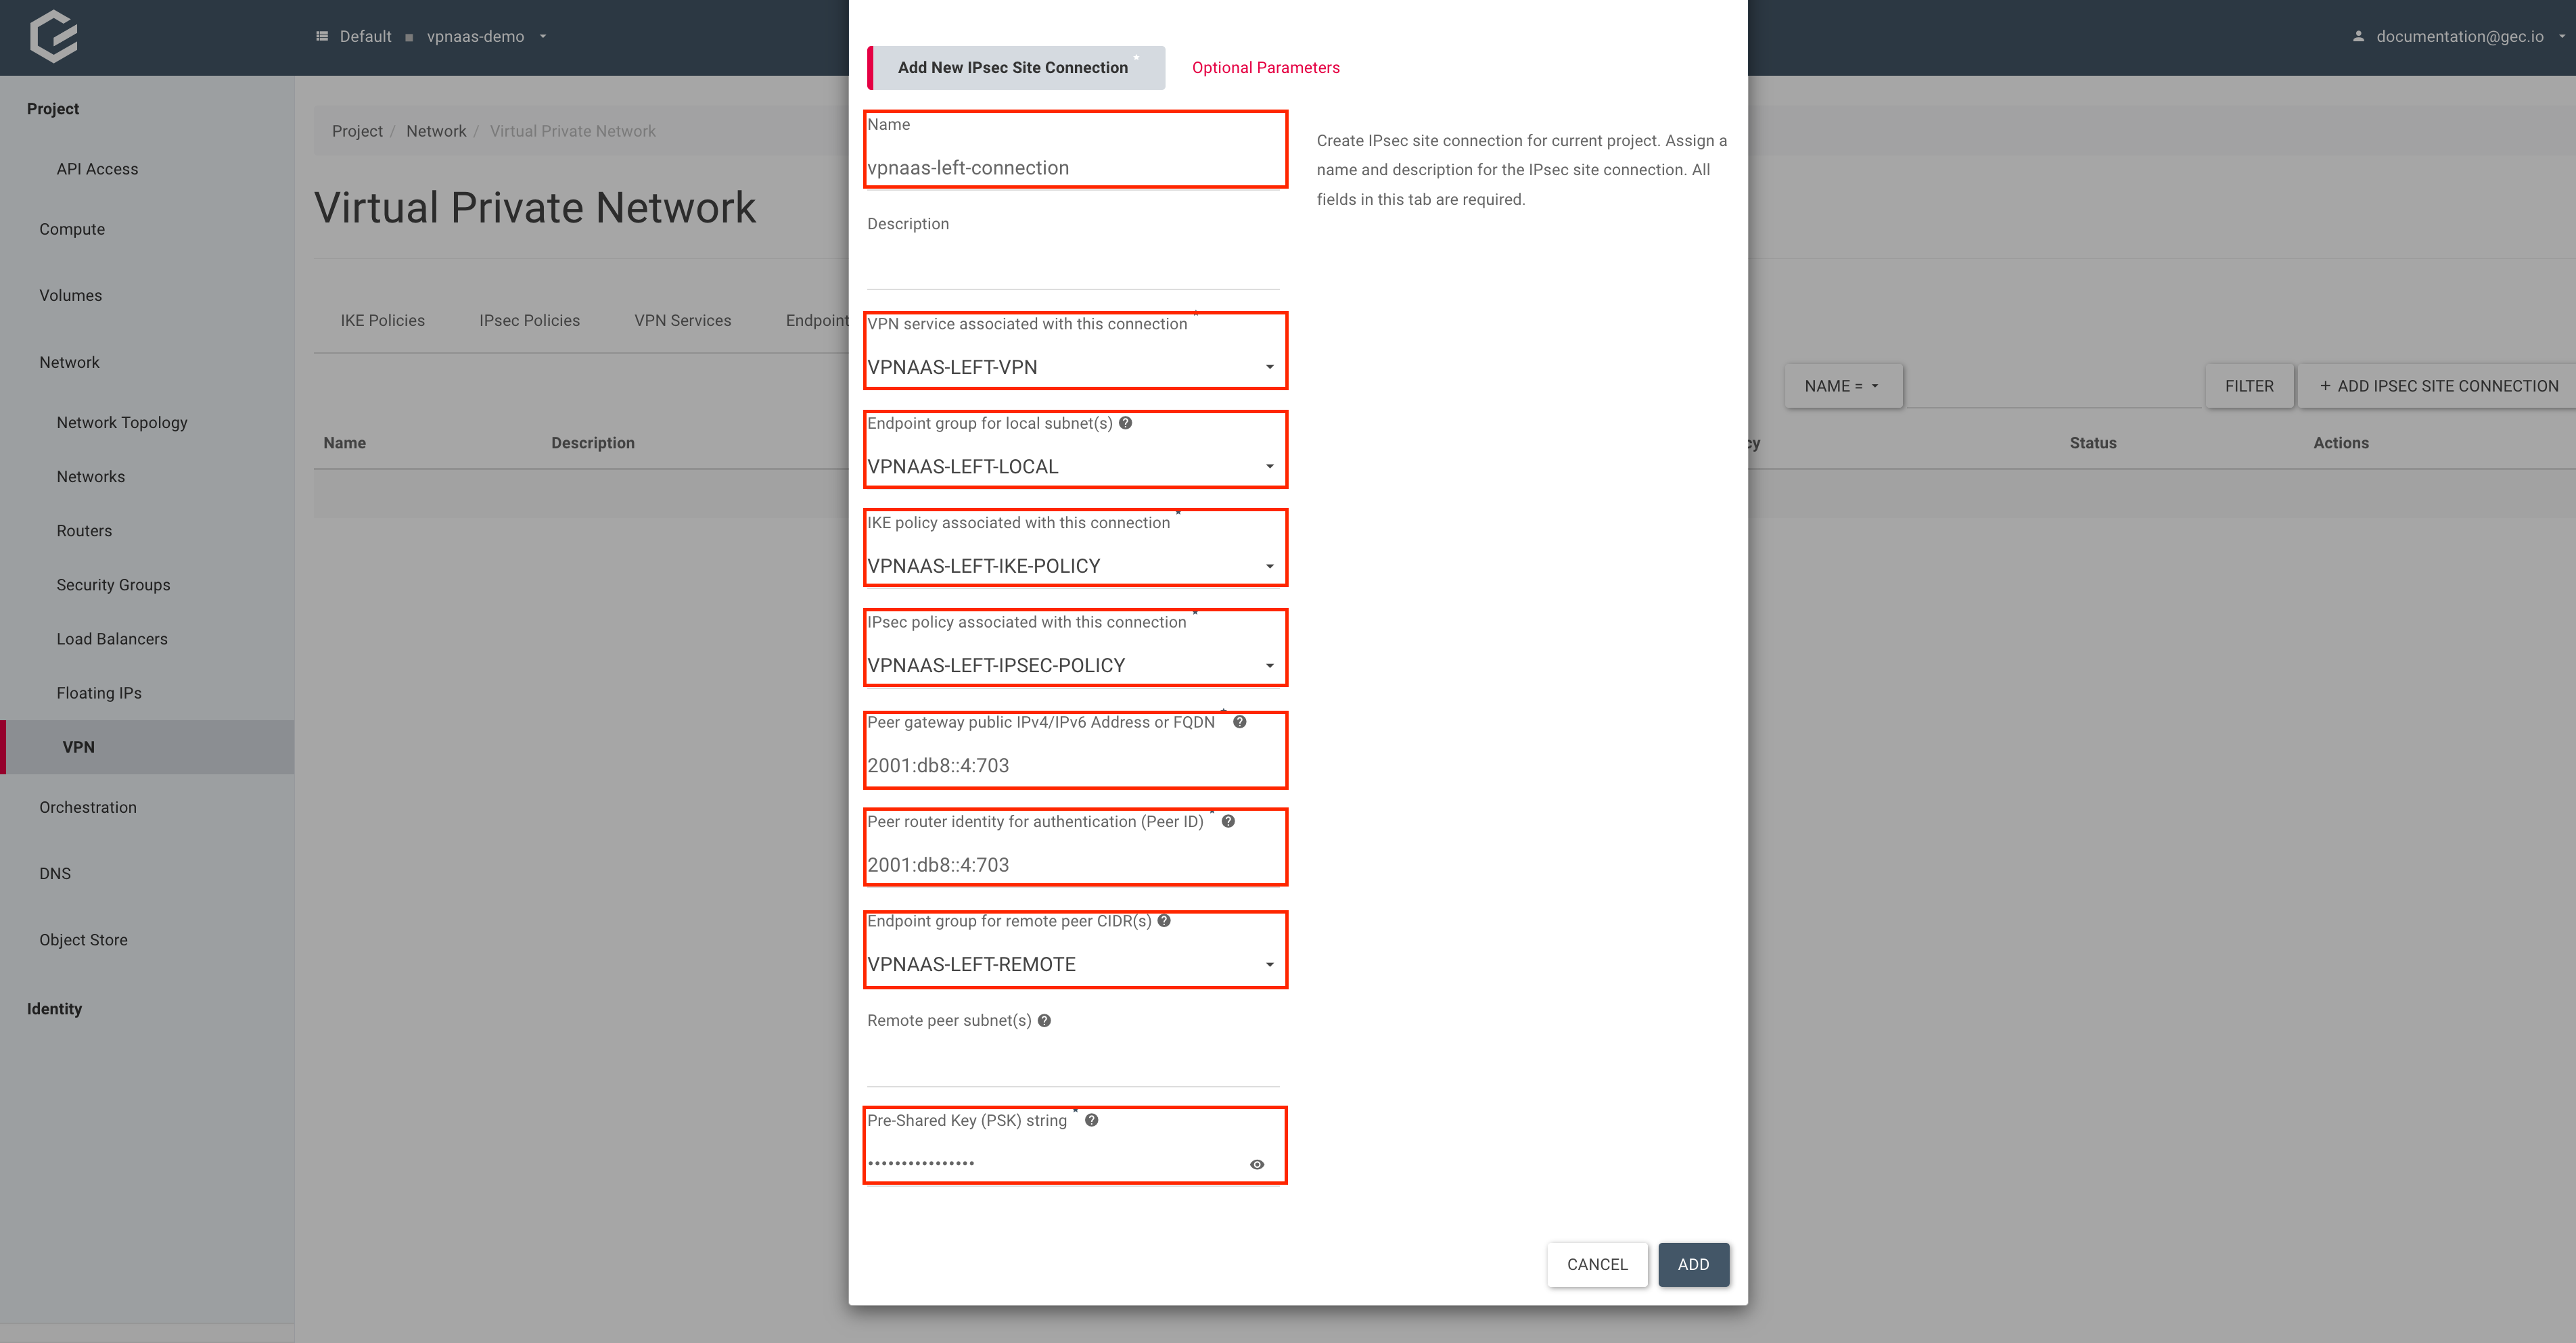
Within your project, navigate to Network → VPN, select IPSec Site Connections and click Add IPSec Site Connection.
Give your connection a name, select the previously created VPN service, local endpoint group, IKE and IPSec policy, Pre-Shared Key, Peer IP and router identity. For the purposes of this guide, we will assume that 2001:db8::4:703 is the IP address of the right router.
Using the CLI
Use the openstack vpn ipsec site connection create command to create the VPN service.
$ openstack vpn ipsec site connection create \
  vpnaas-left-connection \
  --vpnservice vpnaas-left-vpn \
  --ikepolicy vpnaas-left-ike-policy \
  --ipsecpolicy vpnaas-left-ipsec-policy \
  --local-endpoint-group vpnaas-left-local \
  --peer-address 2001:db8::4:703 \
  --peer-id 2001:db8::4:703 \
  --peer-endpoint-group vpnaas-left-remote \
  --psk 1gHAsAeR8lFEDDu7
+--------------------------+----------------------------------------------------+
| Field                    | Value                                              |
+--------------------------+----------------------------------------------------+
| Authentication Algorithm | psk                                                |
| Description              |                                                    |
| ID                       | d81dbe28-ccda-4ee3-ba96-145fadc74e0f               |
| IKE Policy               | 561387b8-b5c1-415e-abc9-79ba93dd48ff               |
| IPSec Policy             | 553a600e-f39d-47a0-9550-97f2b4033685               |
| Initiator                | bi-directional                                     |
| Local Endpoint Group ID  | 949ccc53-5dc6-457d-95bf-278fdf9a3e5d               |
| Local ID                 |                                                    |
| MTU                      | 1500                                               |
| Name                     | vpnaas-left-connection                             |
| Peer Address             | 2001:db8::4:703                                    |
| Peer CIDRs               |                                                    |
| Peer Endpoint Group ID   | 9146346d-1306-4b03-a3ce-04ee51832ed8               |
| Peer ID                  | 2001:db8::4:703                                    |
| Pre-shared Key           | 1gHAsAeR8lFEDDu7                                   |
| Project                  | 281fa14f782e4d4cbfd4e34a121c2680                   |
| Route Mode               | static                                             |
| State                    | True                                               |
| Status                   | PENDING_CREATE                                     |
| VPN Service              | cc258fd7-0e87-4058-ad7d-355f32c1ab5e               |
| dpd                      | {'action': 'hold', 'interval': 30, 'timeout': 120} |
| project_id               | 281fa14f782e4d4cbfd4e34a121c2680                   |
+--------------------------+----------------------------------------------------+